Shopify Payments / Shop Pay - AU Guide
This guide will walk you through setting up an extension store on Shopify using the Reach Embedded solution.
Some sensitive information has been removed from screenshots and will be provided as-needed by your onboarding team at Reach.
Part One
Part One
Setup API for remittance data.
Our first step is to install an API into your Shopify account to ensure smooth reporting and remittance on Reach’s end. Follow these easy steps to complete the process:
Step 1.
Step 1.
Navigate to Settings > Apps and Sales Channels
Step 2.
Step 2.
Click “Develop Apps” in the top-right corner.

Step 3.
Step 3.
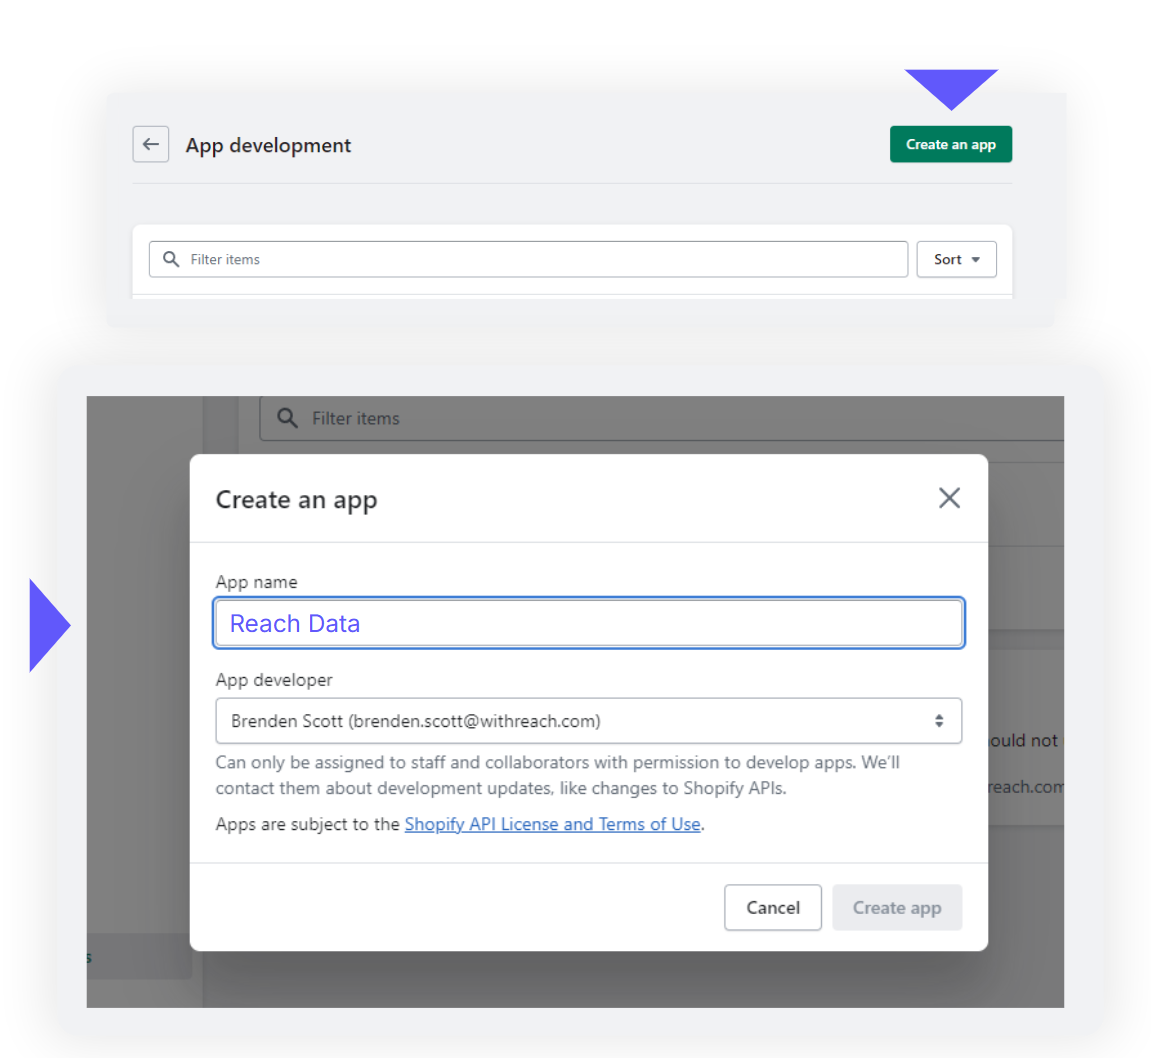
Once clicked, the screen will change - click “Create an app” in the top-right corner.
Step 4.
Step 4.
This should pop up a modal window. You can enter a name for the app, we suggest “Reach Data.”
Step 5.
Step 5.
This will now take you to an overview page.
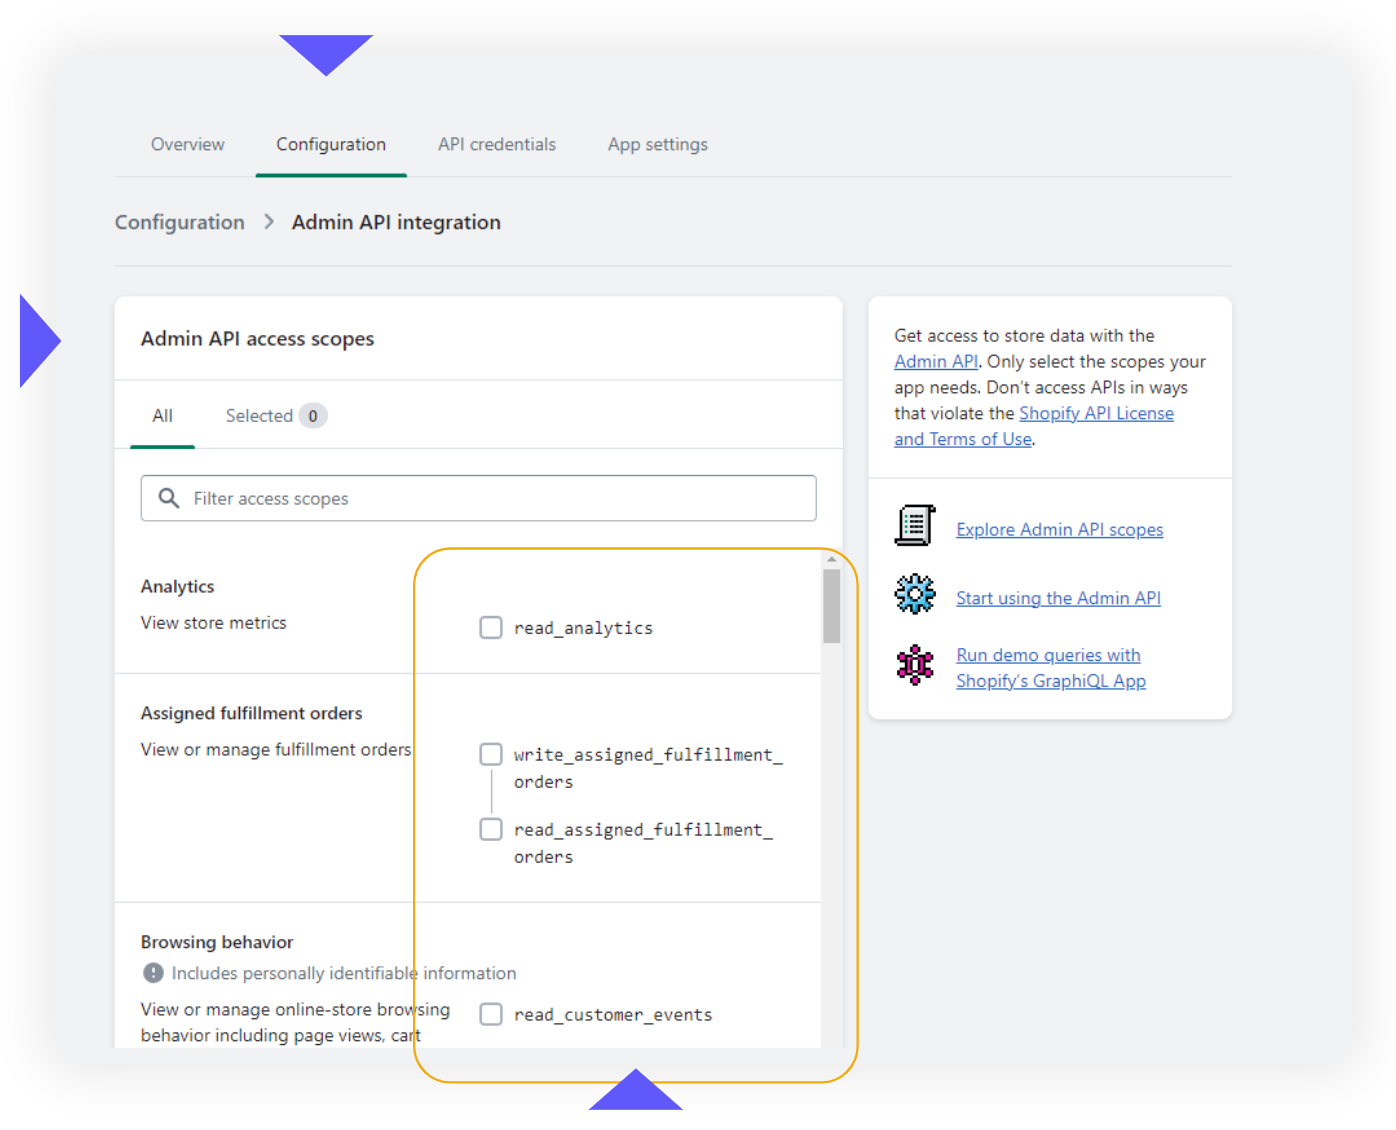
• From tabs at the top, click “Configuration”
• Under Admin API access scopes search and click the checkboxes of:
read_orders
read_products
read_shopify_payments_payouts
read_shopify_payments_disputes
read_shopify_payments_accounts
read_shopify_payments_bank_accounts
• Scroll to the bottom and click “Save”
Step 6.
Step 6.
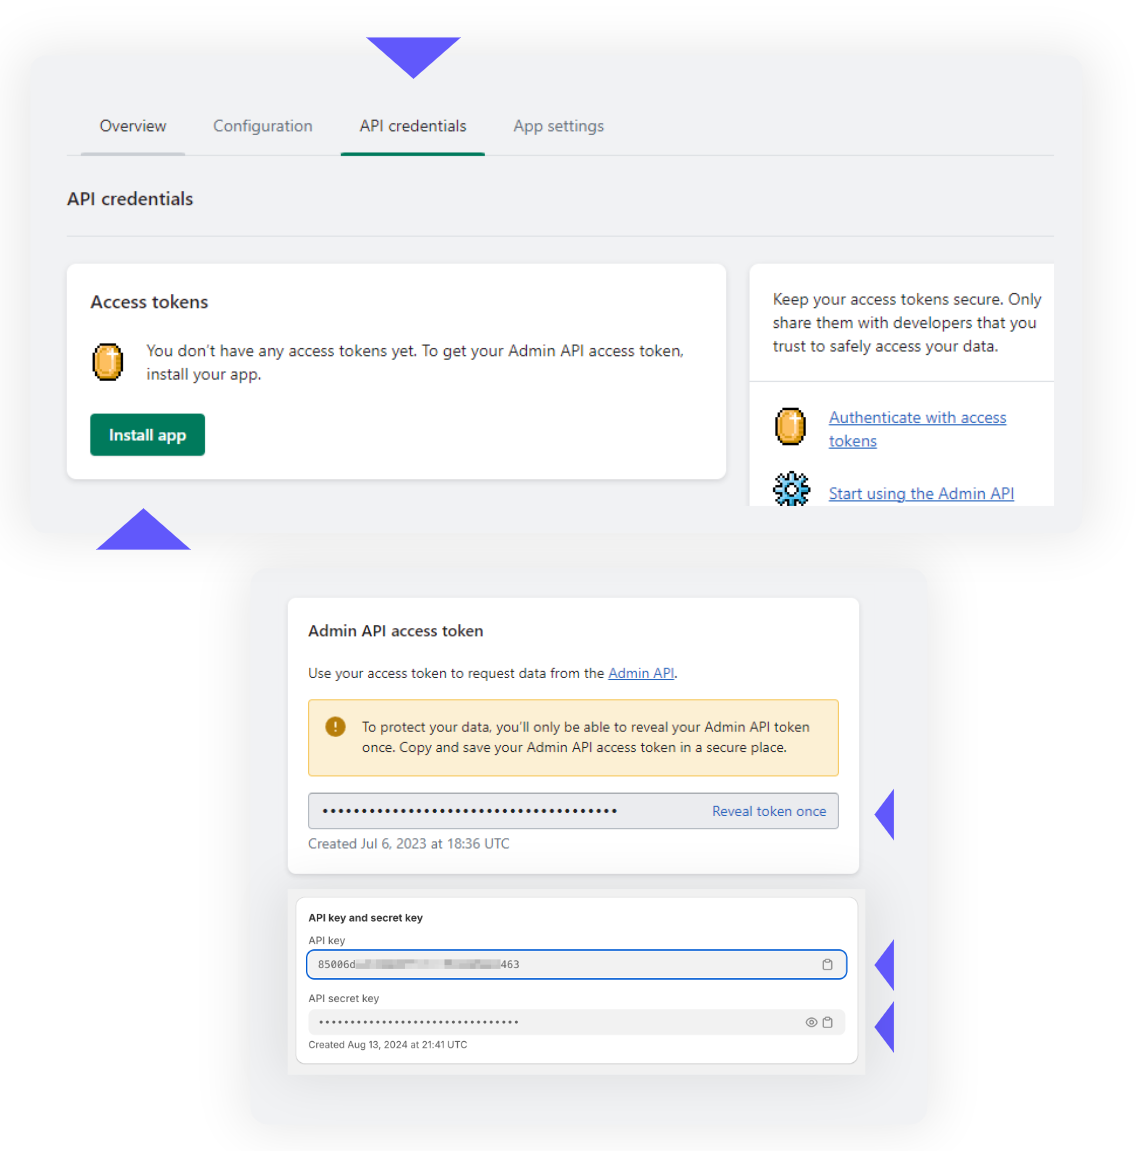
Navigate to API Credentials from the tabs on the top.
• Click “Install App”
Step 7.
Step 7.
You will then be provided with an API Access Token and API Keys
• Click “Reveal token once”
• Copy the following and send to your Reach representative
Admin API access Token
API Key
API Secret Key
Part Two
Go-live call with Reach.
Part Two
Go-live call with Reach.
IMPORTANTThe following steps should not begin until your scheduled Go-Live call with Reach.
Begin entity change.
Begin entity change.
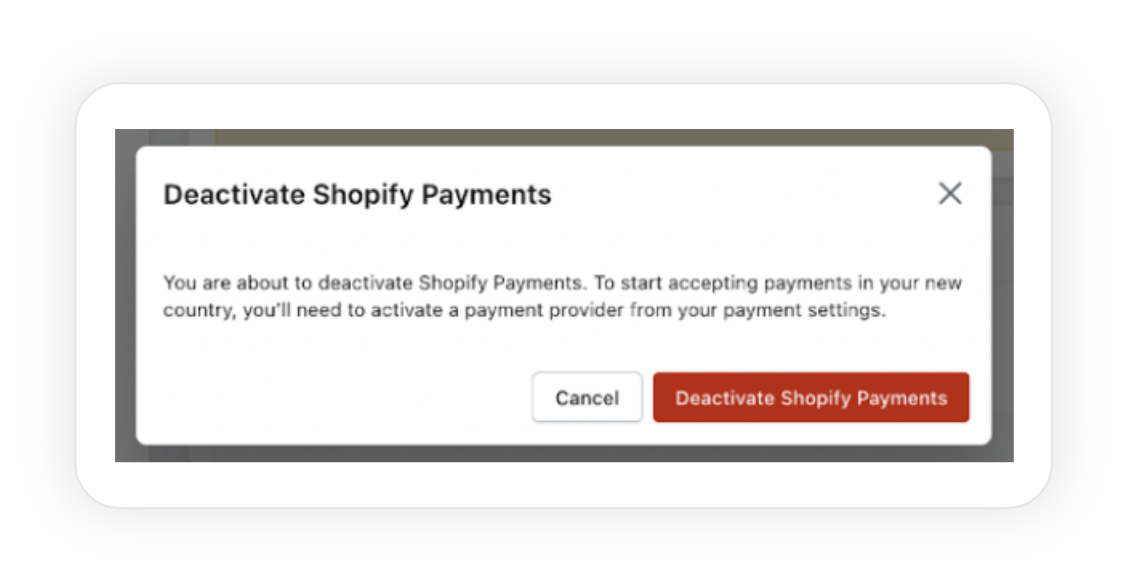
• Please being by going to Settings > Payments
• Deactivate existing Shopify Payments.
• Now, you will be able to change your store’s billing information.
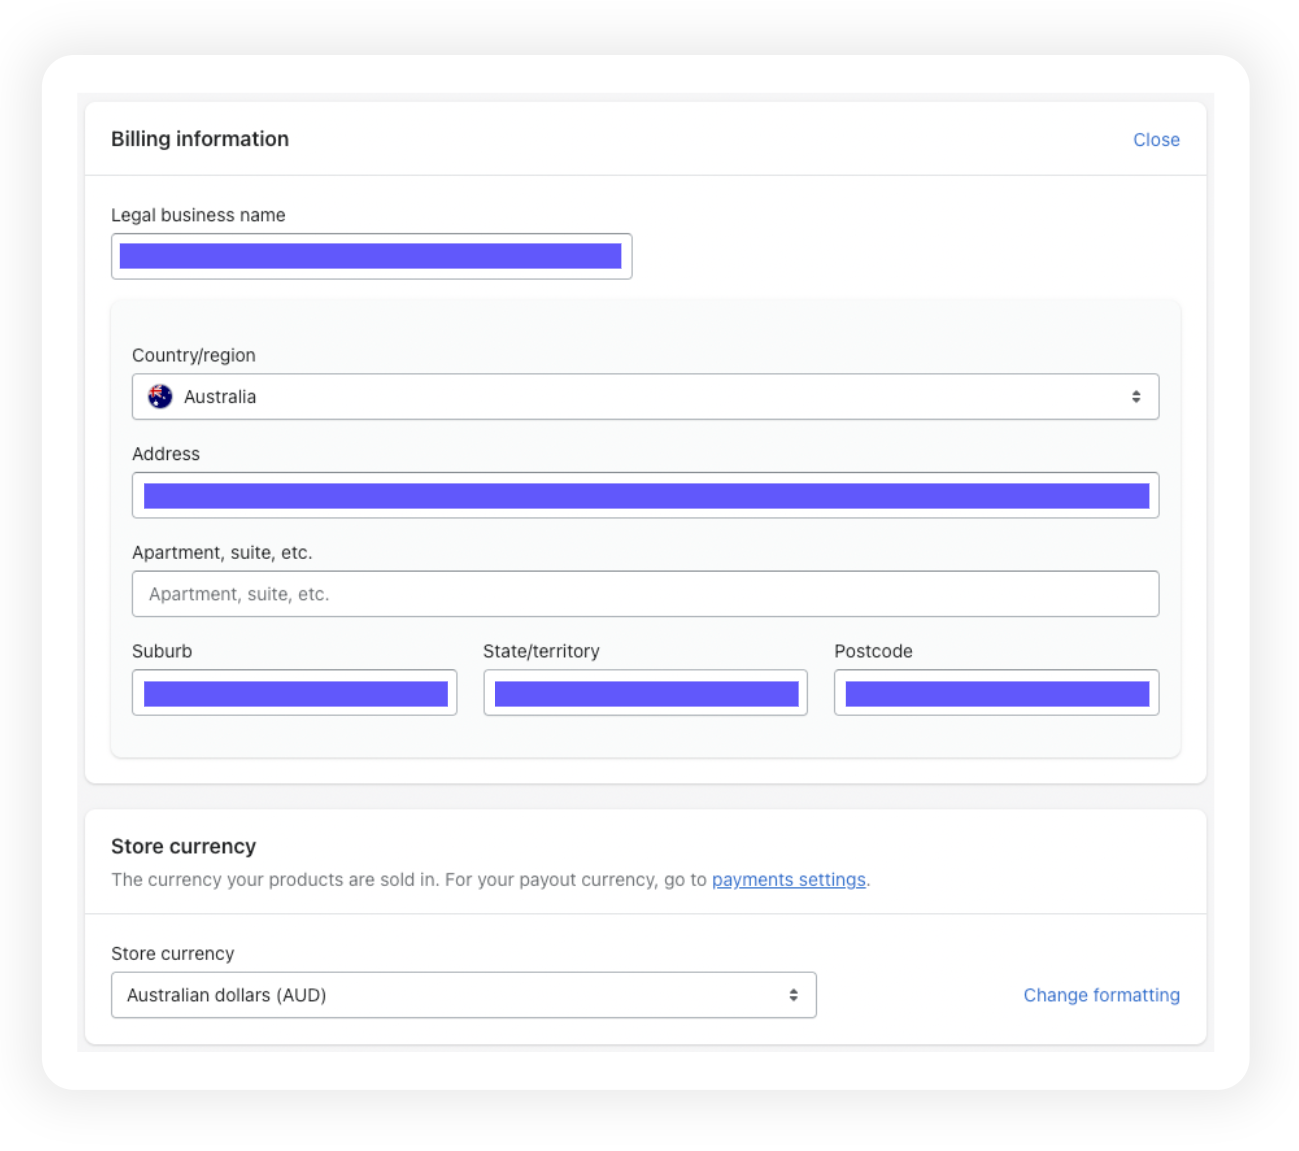
Store entity & address.
Store entity & address.
Change all following business information in Settings > Store Details
Legal business name
Country/region
Address
Suburb
State/territory
Postcode
This information will be provided securely by your Reach onboarding team.
Note that once the currency is changed, the prices must be updated to the new store currency in order to not lose out on the exchange rate.
Part Three
Part Three
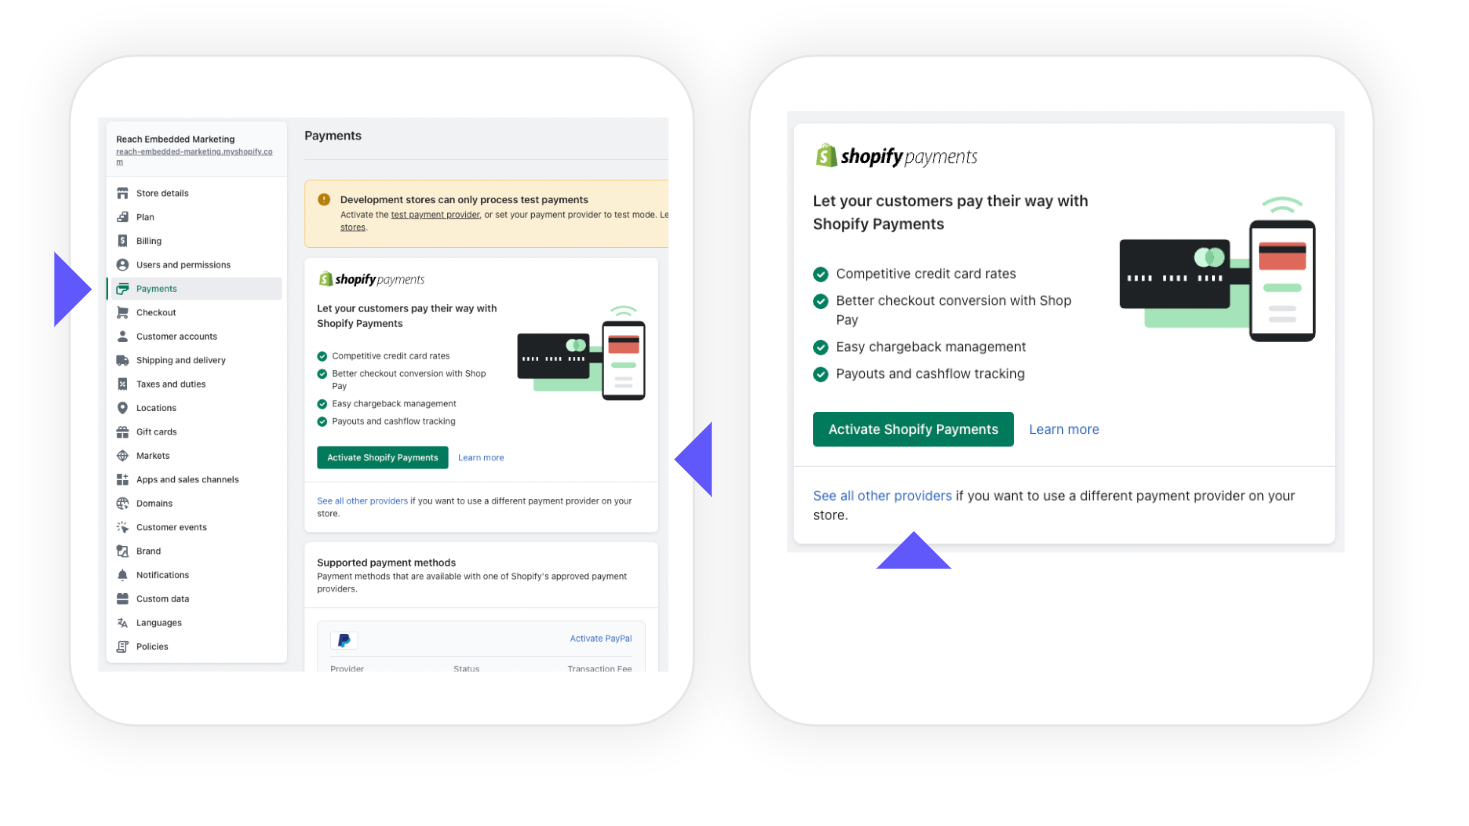
Activate Shopify Payments.
With your store’s billing information updated, it is time to re-activate Shopify Payments.
Step 1.
Step 1.
Navigate to Settings > Payments and click “Activate Shopify Payments.”
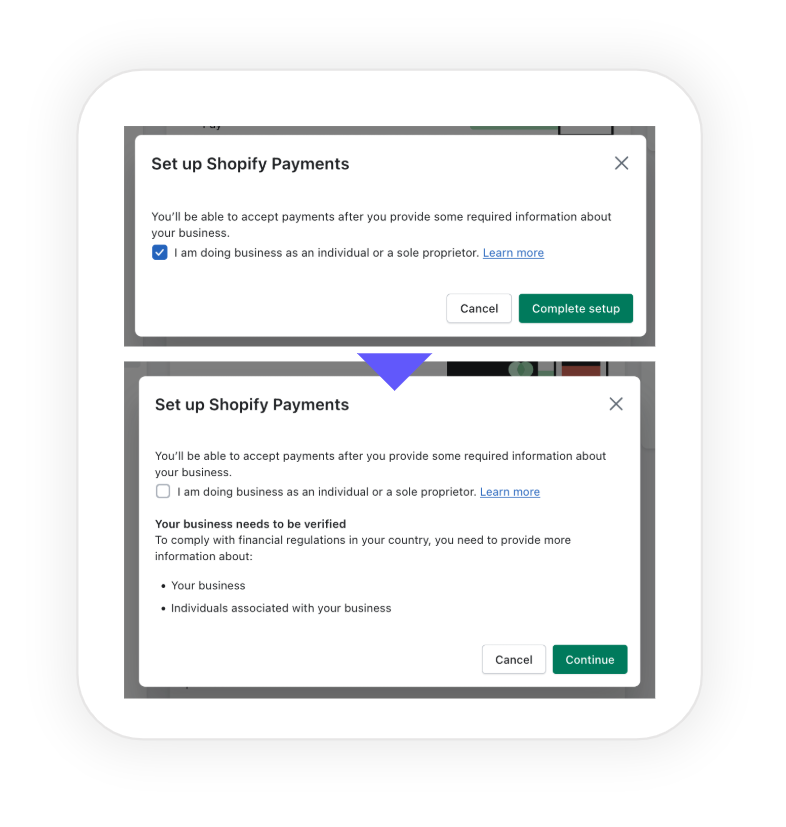
Step 2.
Step 2.
If it is checked by default, please uncheck the box “I am doing business as an individual or sole proprietor.”
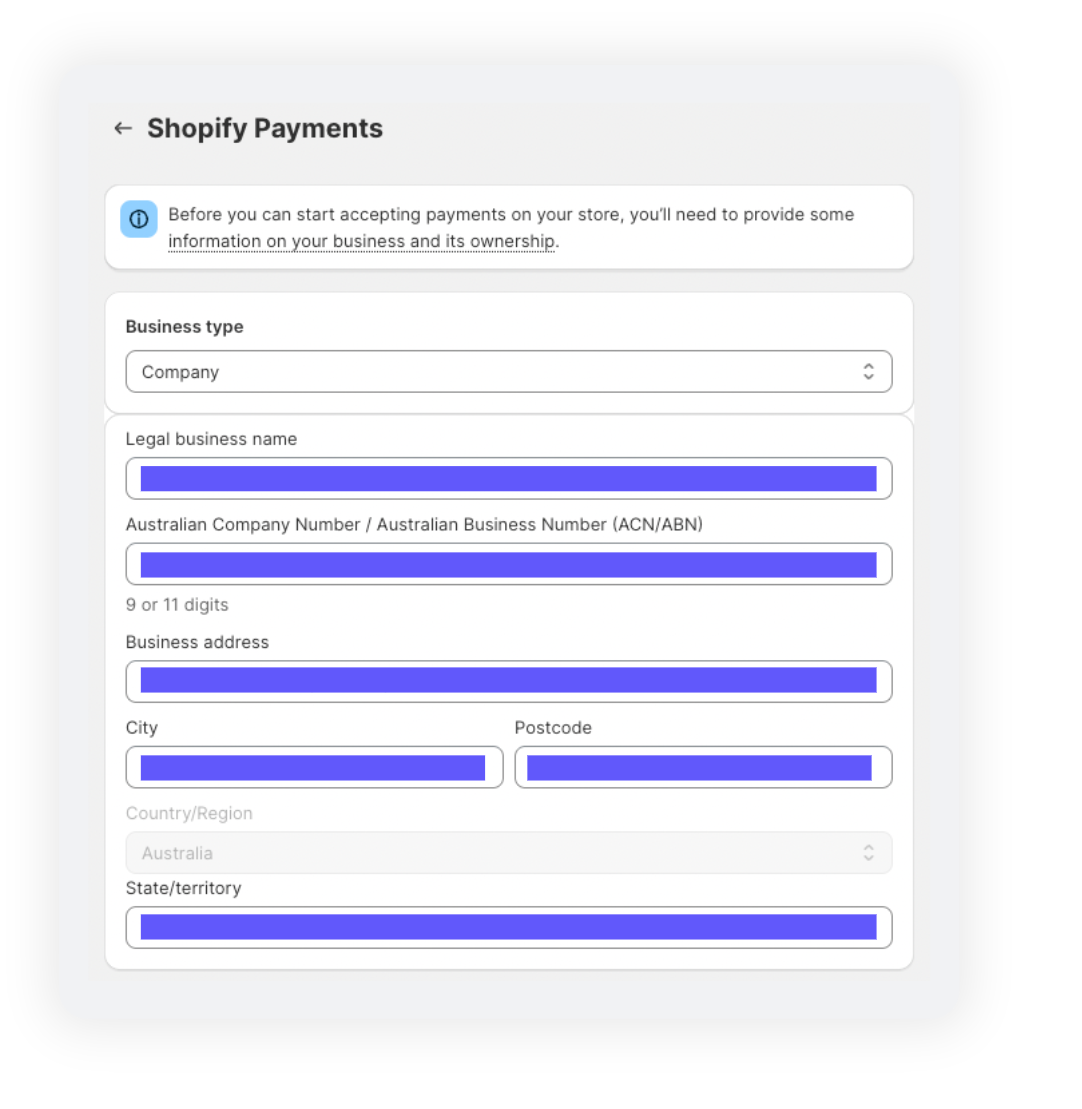
Business Type
Business Type
Change all following business information under "Business Type."
Business type
Legal business name
Australian Company Number / Australian Business Number (ACN/ABN)
Business address
City
Postcode
State/territory
This information will be provided securely by your Reach onboarding team.
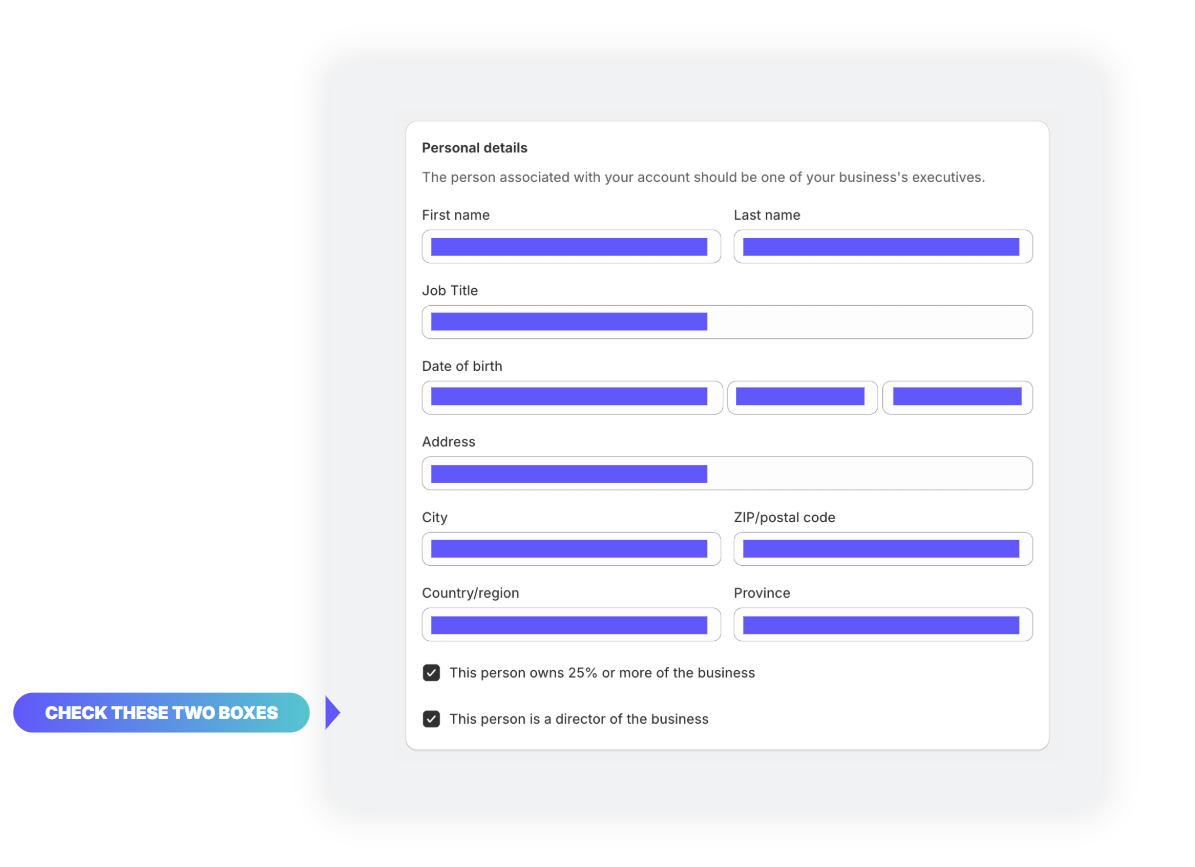
Personal details
Personal details
Enter all other information as detailed under "Personal details." And check the two boxes at the bottom of the form.
First name / Last name
Job Title
Date of birth
Address
City
Postcode
Country/region
Province
This information will be provided securely by your Reach onboarding team.
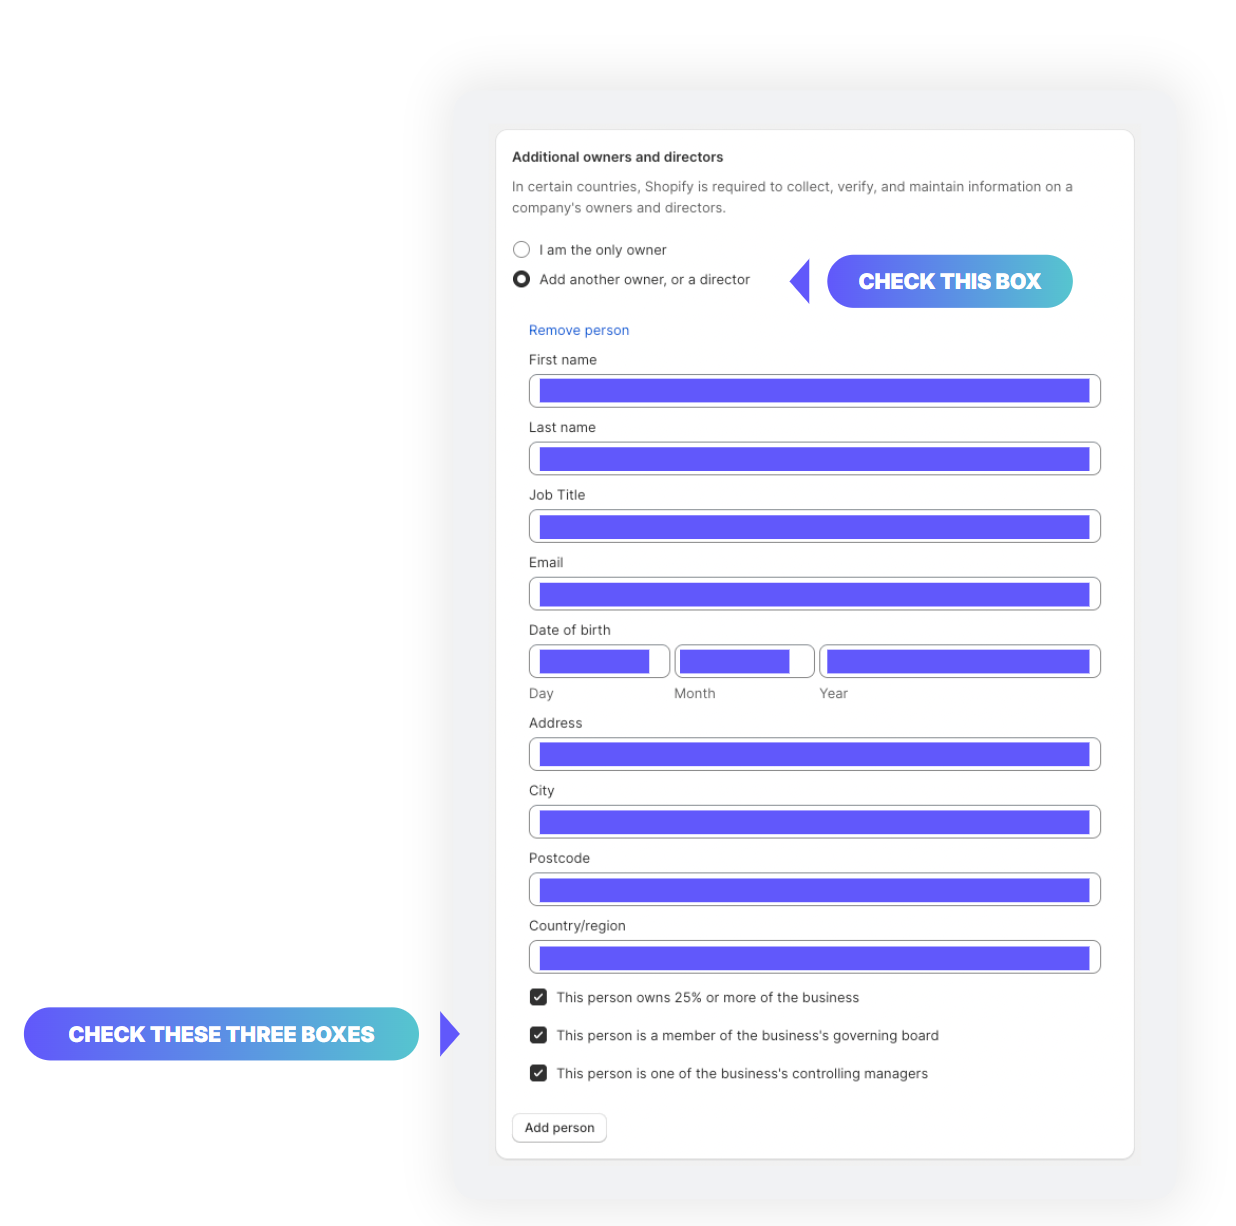
Additional owners and directors
Additional owners and directors
• Check "add another owner, or a director" at the top of the form.
• Enter all other information as detailed under "Additional owners and directors."
• Check the three boxes at the bottom of the form.
First name / Last name
Job Title
Email
Date of birth
Address
City
Postcode
Country/region
This information will be provided securely by your Reach onboarding team.
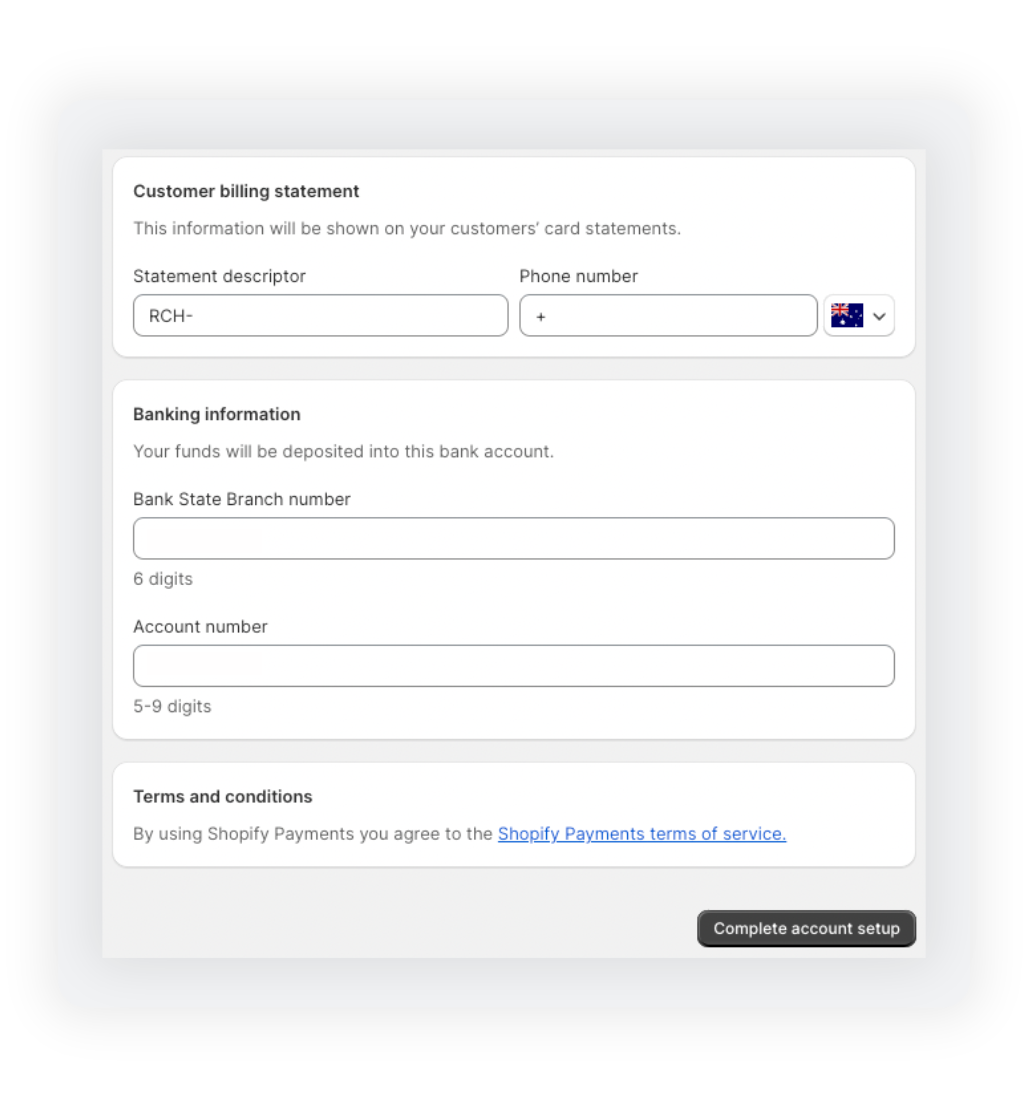
Custom billing statement & banking information
Custom billing statement & banking information
Enter information as provided.
• Statement descriptor
RCH-[your desired descriptor]
• Phone number
[your number]
• Banking information
Enter information as provided by your Reach representative on the go-live call.
Bank State Branch Number
Account Number
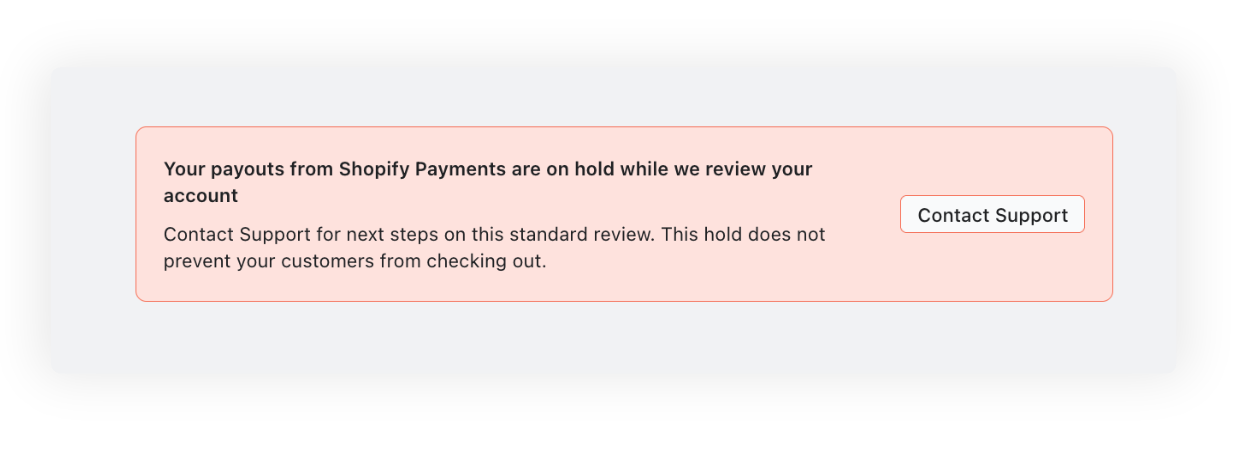
Hold message
Hold message
Please do not be concerned when presented with this message. Payouts will be on hold while Shopify verifies the new account, but shoppers will still be able to checkout and complete their purchases.
Part Four PayPal setup.
Part Four PayPal setup.
To use Reach’s local acquiring solution through PayPal on your Shopify storefront, you will need to contact your Reach representative in order to work through this process together.
Begin by going to Settings > Payments, and under Supported payment methods, click “Activate PayPal.” A new browser tab will open to input PayPal credentials.
Step 1.
Step 1.
Enter credentials. Your Reach representative will provide you login details for localized PayPal processing.
Step 2.
Step 2.
2-factor authentication. Once logged in, there will be an authentication code to input that refreshes every 30 seconds.
Step 3.
Step 3.
Setup complete. Log out of the PayPal browser tab and your setup is complete!

Part Five
Part Five
Terms & conditions
Merchant of Record requirements
By deploying this solution, Reach will be acting as your Merchant of Record. There are legal requirements from our processing partners that we strictly adhere to, such as the Terms & Conditions laid out by our partnership with the merchant.
Please visit this link to read our Terms & Conditions and follow the steps outlined to easily place them on your website - these must be accessible from a link in the footer of your website.
Updated 8 months ago