Step 4d. Activate Shopify Payments for the United States
This guide will walk you through activating Shopify Payments for the United States.
To use Reach's local acquiring solution through Shopify Payments, you must schedule a go-live call with Reach.
ImportantDo not begin this until the scheduled go-live call with Reach. You should only activate Shopify Payments with your Reach representative during that call.
Before you start, choose the appropriate activation method:
- Activate Shopify Payments for a configured credit card payment provider
- Activate Shopify Payments for an unconfigured credit card payment provider
Activate Shopify Payments for a configured credit card payment provider
- From your Shopify admin, go to Settings > Payments.
- Click Activate Shopify Payments.
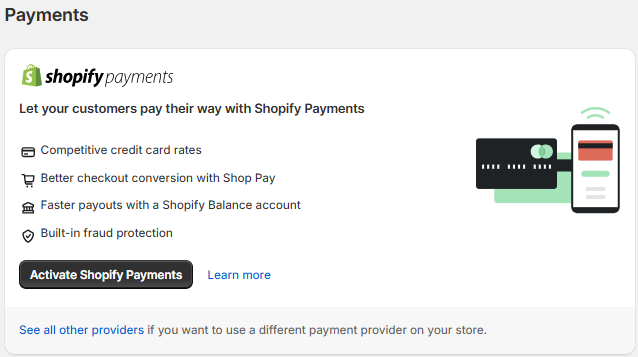
Click Activate Shopify Payments
Activate Shopify Payments for an unconfigured credit card payment provider
If you haven't set up a credit card payment provider, you can complete the account setup on the Complete account setup page. This page guides you through the steps to set up Shopify Payments for your store.
-
To set up Shopify Payments for your store, click Complete account setup.
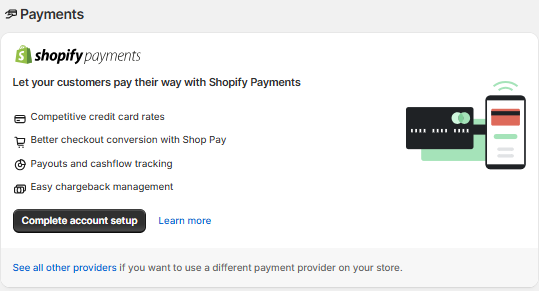
Click Complete account setup.
-
Click Submit details from the Complete account setup page.
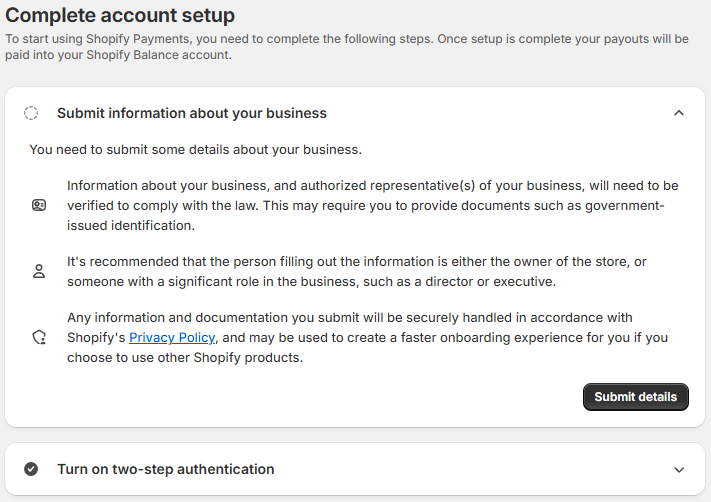
Click Submit details
- Under I am running my store as, select A registered business, select Private multi-member LLC from the Select business type dropdown list, and click Next.
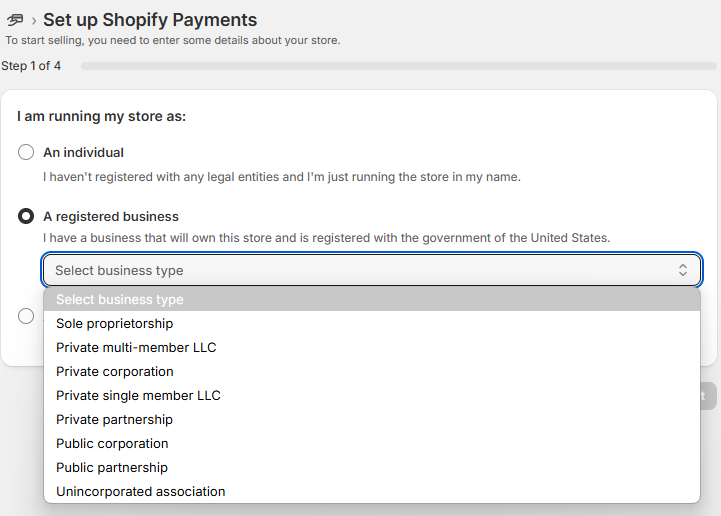
Select A registered business and choose Private multi-member LLC
- Complete the fields under Business details and Business Address by including the following information, and click Next.
| Required information | Description |
|---|---|
| Registered name | Enter the name of the selling entity provided by your Reach representative. |
| Store name (Optional) | Enter the name of your store, if needed. |
| Employer Identification Number (EIN) | Enter the Employer Identification Number (EIN) or Social Security Number (SSN) provided by your Reach representative. The selling entity’s country determines the required fields. |
| Phone number | Enter the phone number provided by your Reach representative. |
| Country/region | Enter the selling entity's country/region provided by your Reach representative. |
| Address | Enter the selling entity's address provided by your Reach representative. |
| Apartment, suite, etc | Enter the selling entity's apartment, suite, etc., provided by your Reach representative. |
| City | Enter the selling entity's city provided by your Reach representative. |
| State | Enter the selling entity's state provided by your Reach representative. |
| ZIP code | Enter the selling entity's ZIP code provided by your Reach representative. |
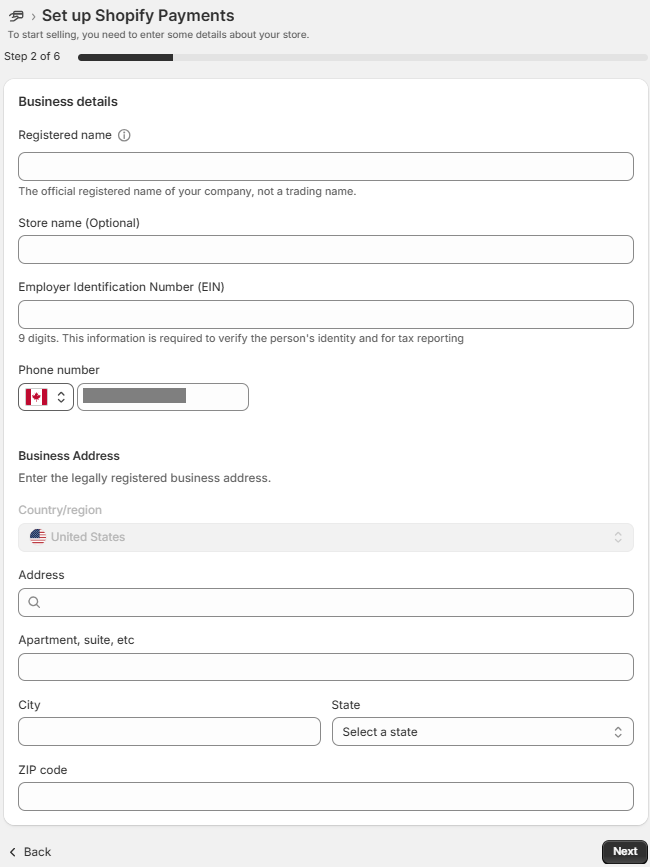
Complete the fields under Business details and Business Address
-
Complete the fields under Industry type and Details in customer bank statement by including the following information, and click Next.
Required information Description Category Select your company’s business category from the Category dropdown list. Sub-category Select your company’s business sub-category from the Sub-category dropdown list. Description of products or services Describe your company’s product or service. Store phone number Enter your store or customer service phone number.
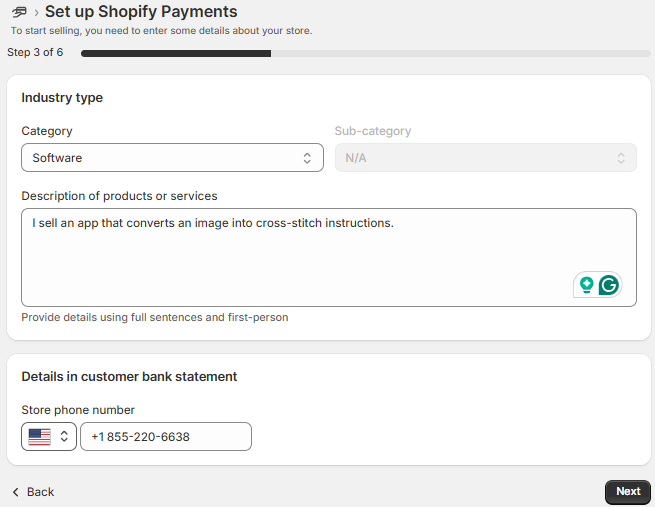
Complete the fields under Industry type and Details in customer bank statement
-
Complete the fields under Account representative by including the following information, and click Next.
Required information Description First name and Last name Enter the name of the account representative provided by your Reach representative. This person owns 25% or more equity in the business. ⬚ No. Clear this checkbox. This person is an executive in the company. ☑ Yes. Select this checkbox. Date of birth Enter the account representative's date of birth provided by your Reach representative. Job role Enter the account representative's job role provided by your Reach representative. Employer Identification Number (EIN) or Social Security Number (SSN) Enter the Employer Identification Number (EIN) or Social Security Number (SSN) provided by your Reach representative. Email Enter the account representative's email address provided by your Reach representative. Phone number Enter the account representative's phone number provided by your Reach representative. Country/region Enter the country provided by your Reach representative. The selling entity’s country determines the required address fields. Address Enter the address provided by your Reach representative. City Enter the city provided by your Reach representative. Province Enter the province provided by your Reach representative. Postcode Enter the postcode provided by your Reach representative.
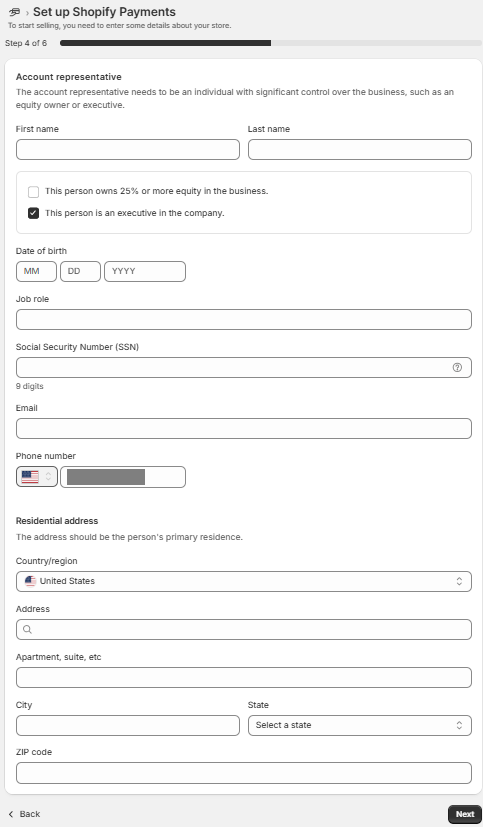
Complete the fields under Account representative
-
Click Next.
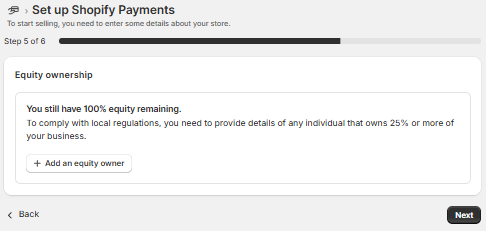
Click Next
NoteThere are no owners who on 25% or more of the business.
- Under Verification, click Upload next to Business document to upload a business document provided by your Reach representative.
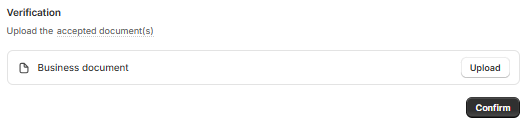
Click Upload
- Select IRS Letter 147C as the document type from the Business document dropdown list.
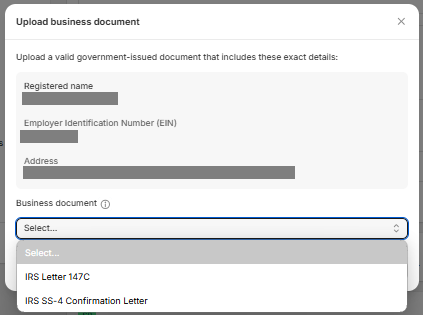
Select IRS Letter 147C from the Business document dropdown list
- Click Add file, select the file, and then click Done. Your Reach representative will provide the required document.
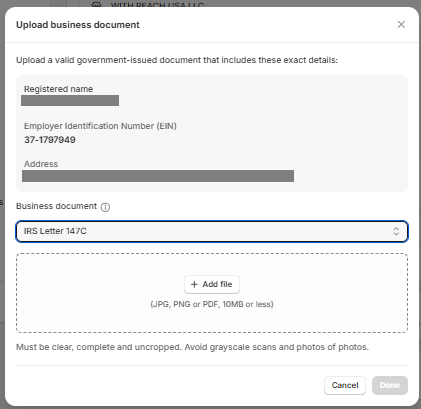
Click Add file
-
Click Confirm.
-
Under Owners, click Confirm.
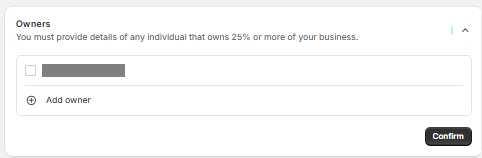
Click Confirm
-
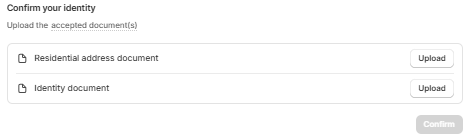
Under Confirm your identity, click Upload next to Residential business document to upload the residential address document provided by your Reach representative.

Click Upload next to Residential business document
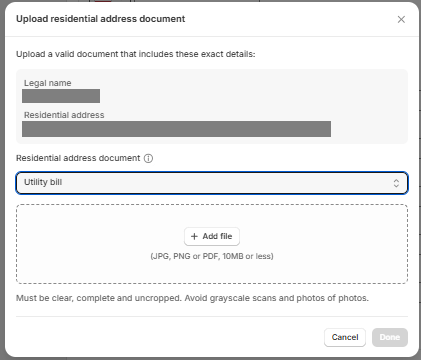
- Select the document type from the Residential address document dropdown list. Your reach representative will tell you what type to select.
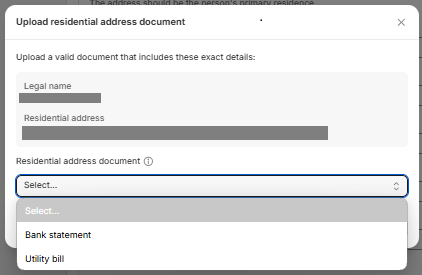
Select the document type from the Residential address document dropdown list
- Click Add file, select the file, and then click Done. Your Reach representative will provide the required document.
Click Add file
- Click Upload next to Identity document and select the document type provided by your Reach Representative from the Identity document dropdown list.
Click Upload
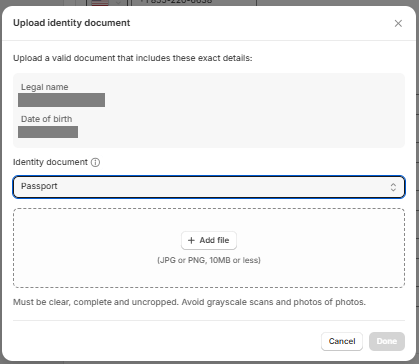
- Select the document type from the Identity document dropdown list. Your reach representative will tell you what type to select.

Select the document type from the Identity document dropdown list
- Click Add file, select the file, and then click Done. Your Reach representative will provide the required document.
Click Add file
- Click Confirm.
- Click Submit for verification.
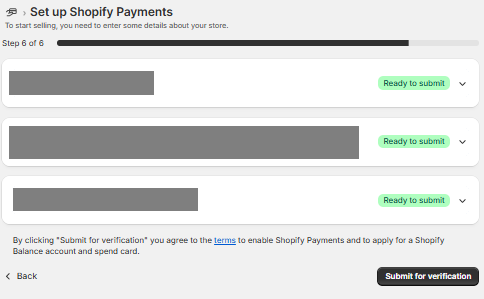
Click Submit for verification
- Click Review terms to review the terms and conditions, and click Agree. For more information, see the Reach disclaimer and Terms of Service requirements.
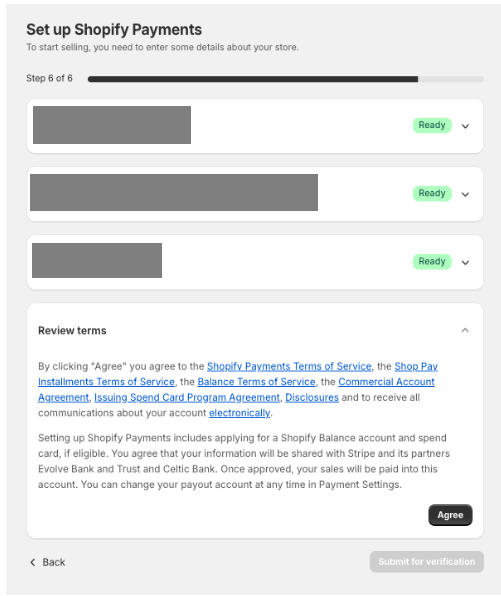
Click Review terms
- Click Submit for verification.
ImportantShopify may require additional documentation for underwriting purposes. Watch the notification bell in your Shopify admin for updates regarding these requirements and submit the necessary documents promptly to holds on your account and avoid payout delays. Submitting the requested documents on time is crucial to ensure the processing of your payouts without delays.