Avalara AvaTax
Reach uses Avalara AvaTax to manage your taxes
Reach integrates with Recurly through Avalara AvaTax to simplify sales tax compliance and enhance business operations. To ensure you remain compliant, this integration provides real-time tax calculations for all your Recurly transactions.
Steps to complete before integration
Your Reach representative will provide you with credentials to your configured Avalara AvaTax account through Reach. These are required to complete the following steps during the go-live call. To recieve your credentials, contact [email protected] or your Reach representative.
To ensure a smooth integration of Avalara AvaTax with your Recurly account, follow this checklist before connecting your Avalara AvaTax account:
- Confirm that the addresses for your business entities are accurate.
- Decide whether to apply tax based on the billing address or the customer's account address.
- Update your purchase form to include at least the minimum address fields required for your tax regions.
- Verify that the current customer addresses you plan to tax are correct and include the country.
Connect your Avalara AvaTax account to Recurly
Complete the following steps to connect Avalara to the Recurly platform:
Ensure your site is in production mode. You can conduct tests in sandbox mode, but you will be limited to Avalara's development environment.
Add Avalara AvaTax app
Use the provided credentials to connect your Reach-managed Avalara account to Recurly. Follow the steps below to add and connect the Avalara app:
- Sign in to Recurly.
- Expand Configuration and click Taxes in the left navigation pane. The Taxes page will appear.
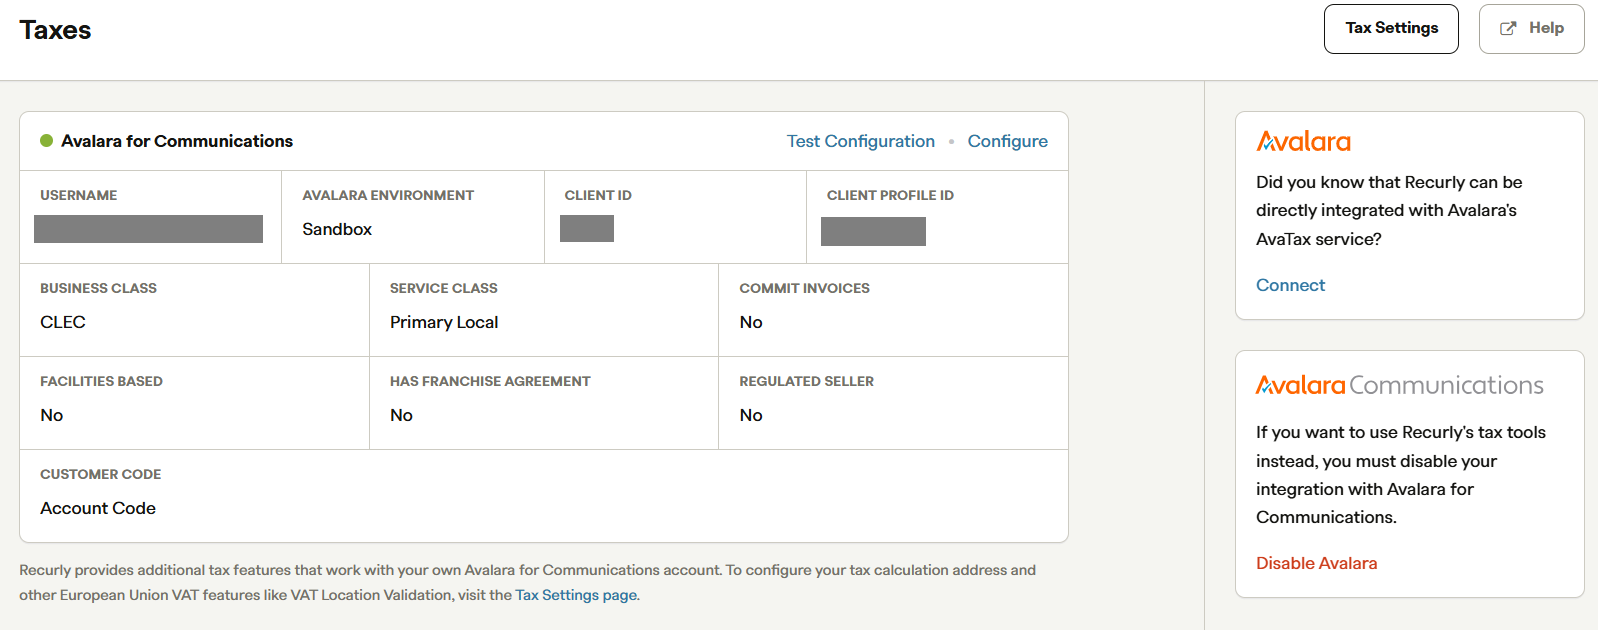
Taxes page
- Click Connect in the Avalara pane to access the Avalara AvaTax Settings sign-in page.
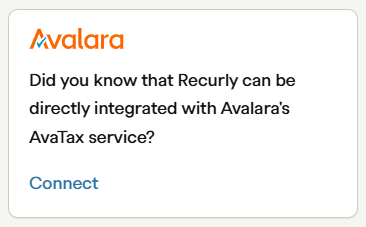
Click Connect
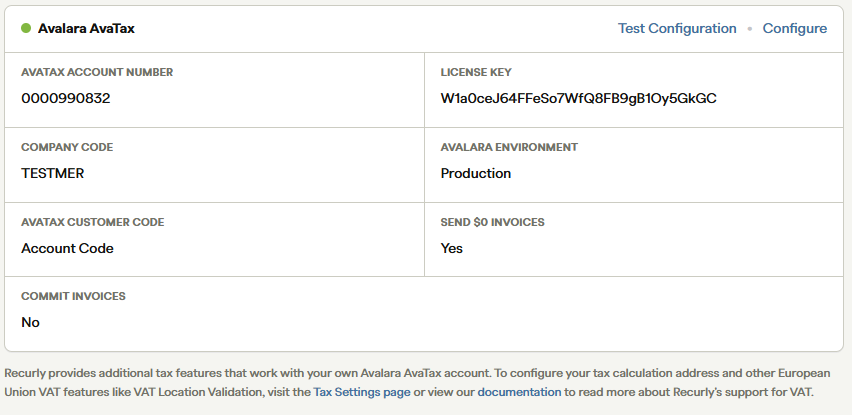
- From the Avalara AvaTax Settings page, sign in to Avalara AvaTax using the credentials provided by your Reach representative. See the table below for descriptions of the fields on the AvaTax Credentials page:
| Field | Description |
|---|---|
| AVATAX ACCOUNT NUMBER | Enter the AvaTax account provided by your Reach representative. |
| COMPANY CODE | Enter a unique code provided by your Reach representative. |
| LICENSE KEY | Enter the AvaTax license key provided by your Reach representative. |
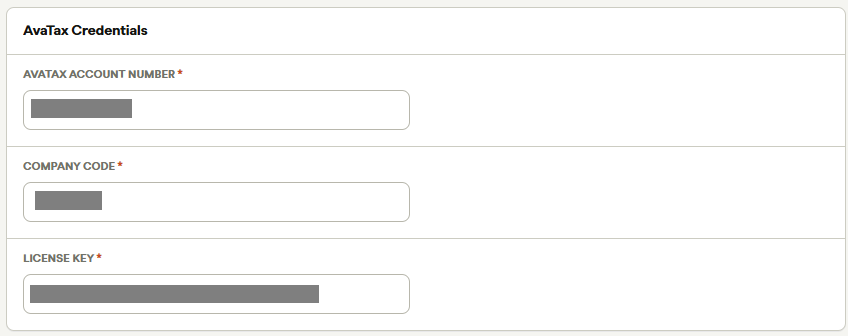
AvaTax Credentials
- Configure the fields under AvaTax Settings using the information provided by your Reach representative and click Save Changes. See the table below for descriptions of the AvaTax settings :
| Field | Description |
|---|---|
| WEBSERVICE URL | Select Production to use https://rest.avatax.com to process real transactions in your production environment. We recommend selecting Production. |
| Which Recurly Account Identifier do you want to use as your AvaTax Customer Code? | Select Account Code to set and use the Recurly Account Codes by default. |
| Send $0 invoices to Avatax for processing. | Decide whether to send $0 invoices at the start of a free trial. When you select the checkbox, Avalara will not apply taxes on the invoices, but you will still be charged for them. To avoid Avalara charging you for these invoices, clear this checkbox. |
| Commit invoices to Avalara | ⬚ No. Clear this checkbox. |
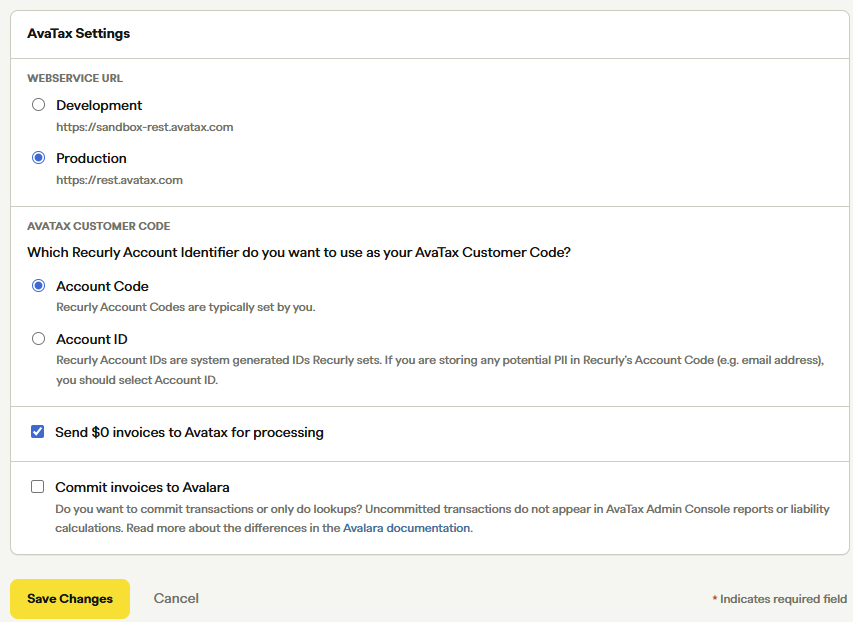
AvaTax Settings
-
Click Save Changes.
-
To test the connection, click Test Configuration.
Click Test Configuration
Configure tax settings
After adding the Avalara app to Recurly, configure the tax settings according to your needs. Follow the steps below to configure your tax settings in the Avalara app:
- After connecting your Avalara AvaTax account, click Tax Settings at the top right corner of the Tax page.
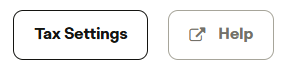
Tax Settings button
-
On the Tax Settings page:
- Choose to apply tax based on the billing or the customer's account address.
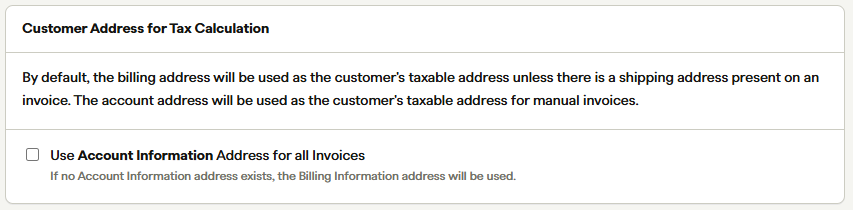
Customer Address for Tax Calculation
- Choose to tax line items based on the line item's Account Information Address.

Account Hierarchy Tax Settings
iii. Choose the tax service response and address settings.
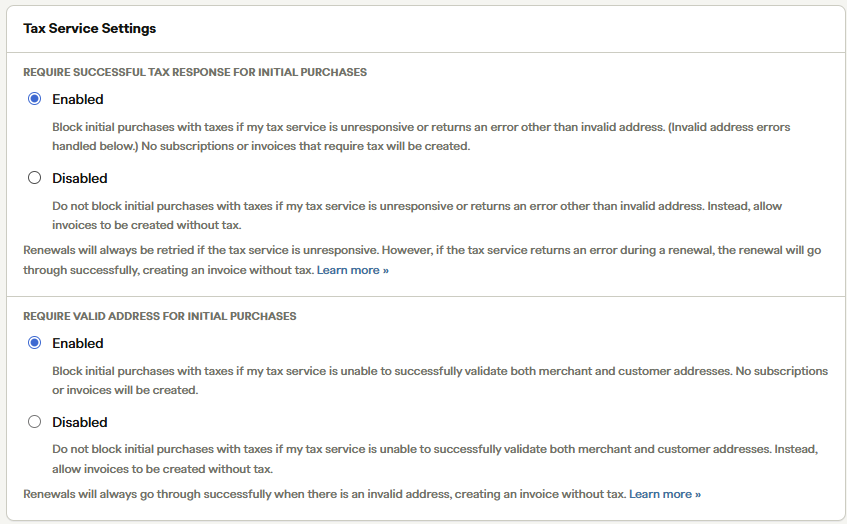
Tax Service Settings
iiii. Select whether to enable GST and VAT Location Validation for Australia, the European Union, the United Kingdom, and New Zealand. For the European Union and the United Kingdom, choose whether to enable Country Invoice Sequencing if you use invoicing for the European Union and the United Kingdom.
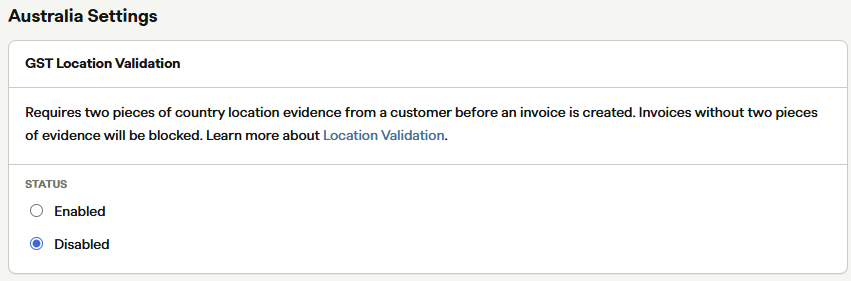
Australian Settings
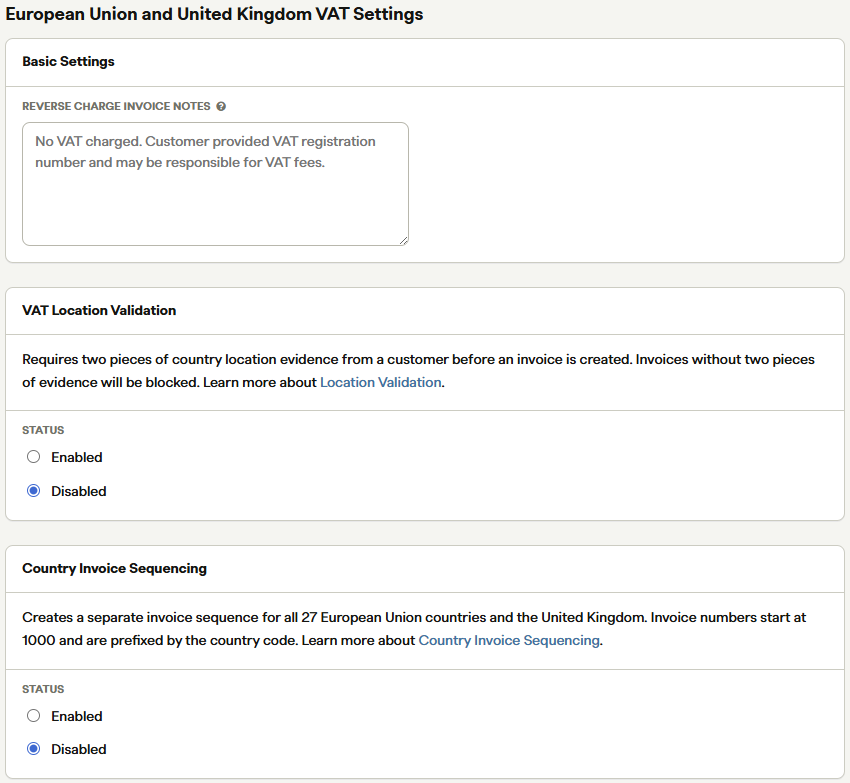
European Union and United Kingdom VAT Settings
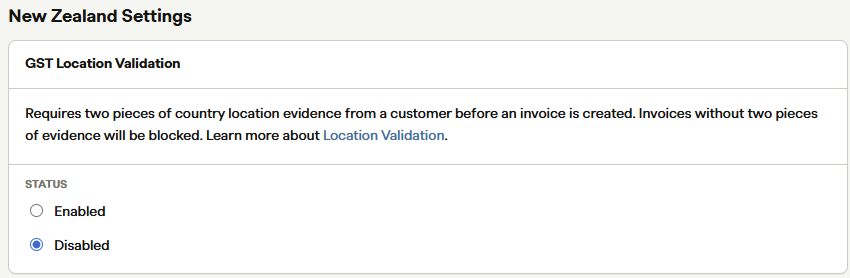
New Zealand Settings
-
Click Save Changes.
Configure plans or items if required
To configure taxable Avalara line items, set up the plans or items by following these steps:
- Click Save Changes. Any customer in one of your tax jurisdictions who purchases this plan will now be taxed.
- Expand Configuration and click Plans or Items.
- Choose one of the following options:
- From the Plans page:
- Hover over a plan and click Edit.
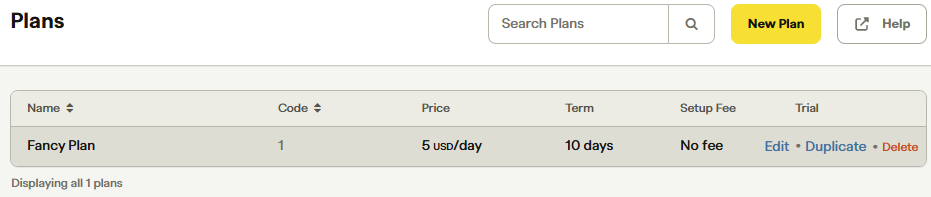
Click Edit
- Select the Collect Tax checkbox under Billing Details to make all plan items taxable: the setup fee, the plan fee, and the add-on fees.
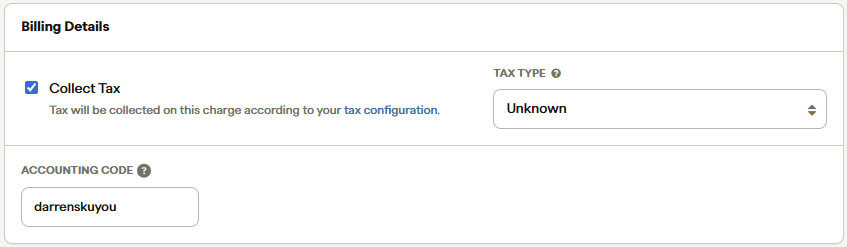
Billing Details
-
Ensure the ACCOUNTING CODE matches the code provided by your Reach representative.
-
Click Save Changes. Any customer in one of your tax jurisdictions who purchases this plan will now be taxed.
{null}Add tax to the line item price
- From the Items page:
- Click an item in the Items table.

Items page
- Click Item Actions and select Edit Item from the dropdown list.
c. Ensure the ACCOUNTING CODE under Item Details matches the code provided by your Reach representative.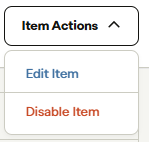
Select Edit Item.
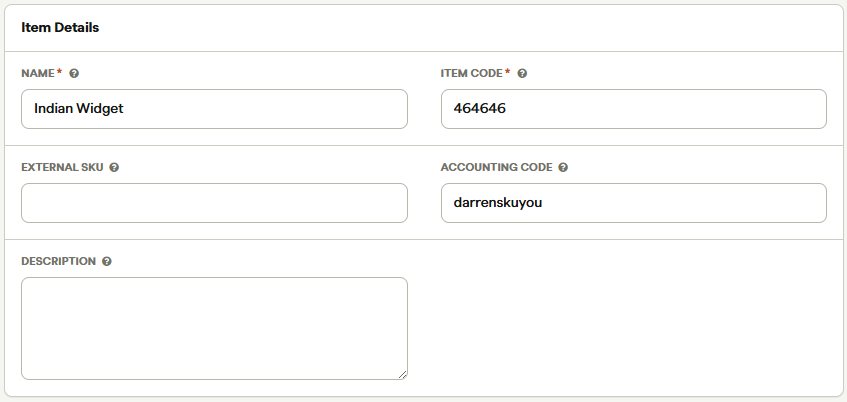
ACCOUNTING CODE field
- Click an item in the Items table.
- From the Plans page:
For more information on Avalara Tax and Recurly, visit the Recurly AvaTax page.
Verify the business entity displays the correct address
Set up the business entity and ensure it displays the correct address.

Business entity