Account settings
Learn how to manage your personal profile and account settings
Access your account settings
To access your account settings, click the menu icon in the upper-right corner on any page and select Account Settings. Here, you'll find a comprehensive array of options to update your profile information, adjust privacy and security preferences, and manage your account access.

Profile
On the profile page, you can edit your personal information, including your name, phone number, address, and job title. You can change your profile picture by hovering over the image and selecting the edit icon.
Privacy & security
On this page, you can change your password, set up multi-factor authentication (MFA), and view all current login sessions.
- To change your password, click the Edit icon next to Password.
2. Enter your old password, then type in your new password. To ensure a strong password, please meet all listed password requirements.
3. To complete the process, re-enter your new password, and click Change Password.
Workspace features
Security for admins
Only admins can view and make edits in this section.
The top of this page displays a summary of recommended actions. Click the Manage button in the corner to follow each recommendation. Under the Security Check-up section, you can customize various security settings, including MFA requirements, passwords, restrictions, session settings, and inactive users, and view each specific recommendation.
Reach has preconfigured robust security settings that should not require alterations. However, you can customize them to be more restrictive if needed.
Multi-factor authentication (MFA)
The Summary tab displays all users enrolled in MFA and those who are not enrolled.
Reach strongly encourages our suppliers to implement MFA for their users. We provide three options for MFA implementation under the Configuration tab.
- Don't Force: Users can enable MFA but it is not required.
- Force: All users must enable multi-factor authentication (MFA).
- Force except enterprise SSO: All non-enterprise single sign-on users must enable MFA.
Sessions
Adjusting session settings can help maintain a secure environment. There are three configuration options:
- Idle Session Timeout: Define how long a user session can remain idle in minutes before the session ends.
- Force Re-login: Require users to sign in again if their active or inactive session exceeds the specified time limit (in days).
- Maximum Concurrent Sessions: Set the maximum number of sessions a user can have open simultaneously. New sessions will automatically log out their oldest session.
Password
The Summary tab displays users with breached passwords.
In accordance with best practice, Reach monitors third-party databases that identify compromised data. If there is a match between a user and a database, Reach flags it. This proactive measure to ensure the security of your account.
In the Configuration tab you can set:
- User lockout: Set the maximum number of sign-in attempts with the wrong password before the user gets locked out.
- Password history: Set the number of times a user must enter new passwords before they are allowed to reuse an old one.
Inactivity
This page displays all users who have not signed in for a specified period of time.
Restrictions
Under the IP tab you can restrict account access to a single IP address. The Domain tab allows you to restrict account access invitations to users with an approved email domain. However, adding a domain restrictions does not affect existing users.
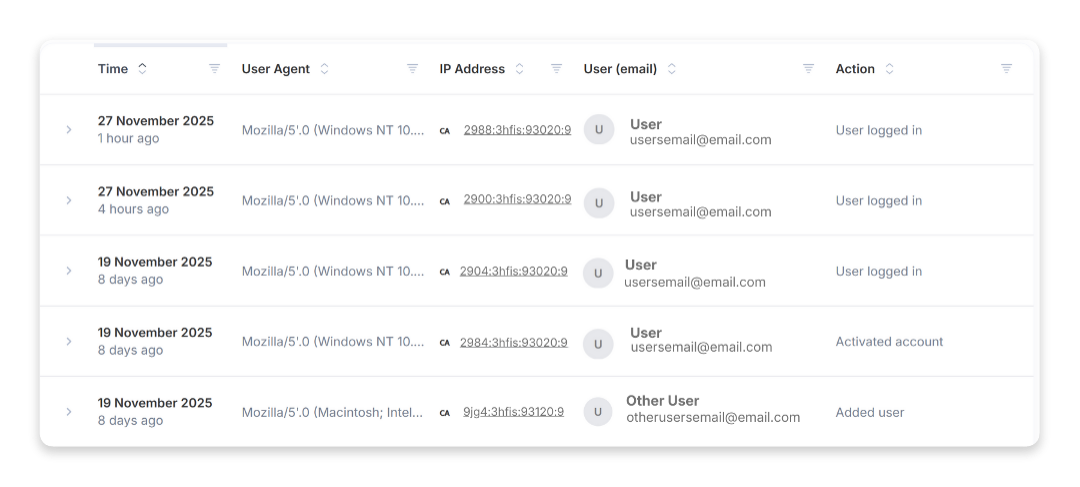
Audit logs for admins
Only admins can view this section. The audit log displays all security-related activity performed on the platform by each user, along with the time it occurred.
All accounts section for admins
Only admins can view this section. You can review the account assigned to you and all sub-accounts under your account.
You can switch between table and graph view and click into each account and sub-account.
Users tab
Under the Users tab in your account settings, you can invite users, delete users, or edit a user's role.
To move a user to a different account or sub-account, you must first delete the user and then re-add them to the correct account.
Invite a user
- Select All Accounts from the side navigation menu and select the desired account.
- Click Invite Users.
- Enter the user's email address and select a role from the Select Role dropdown.
- You can toggle whether this user has access to the sub-accounts under them. You will need to do this if you are adding another admin. You can also toggle sub-account access within the user list.
- Click Invite.
The invited user will receive an email with the subject line:
Let's activate your account
Edit a user's role
Follow the steps below to edit a user's roles.
- Click All Accounts.
- Click the correct account name to open the account.
- Click the vertical dots menu to the right of the user and selectEdit user roles .
- Select the user's new role and click Update.
Delete a user
Complete the steps below to delete a user.
- Click All Accounts.
- Click the correct account name to open the account.
- Click the vertical dots menu to the right of the user and select Delete User.
Sub-accounts tab
The Sub-Accounts tab allows you to view all sub-accounts associated with the selected account. Using the vertical dots menu, you can click directly into a sub-account.
SSO
Single Sign-On (SSO) lets you access multiple applications with a single set of credentials. With SSO, you can link the Reach Admin Portal with your corporate identity management and authentication providers.
Follow the instructions below to set up an SSO connection:
- Select SSO from the side navigation menu.
- Click Setup SSO connection.
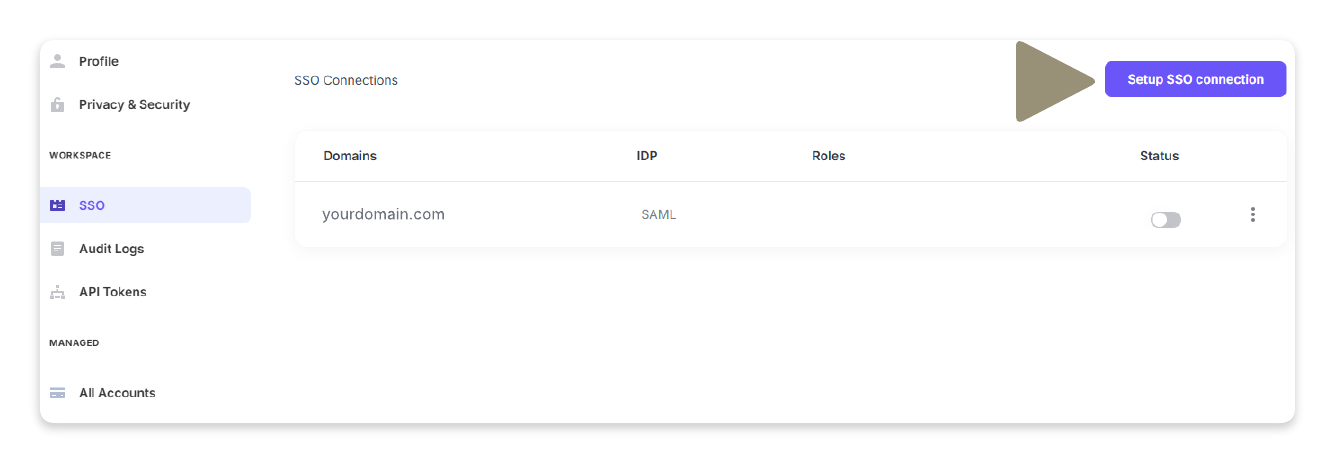
- Under SAML, select your organization's Security Assertion Markup Language (SAML).
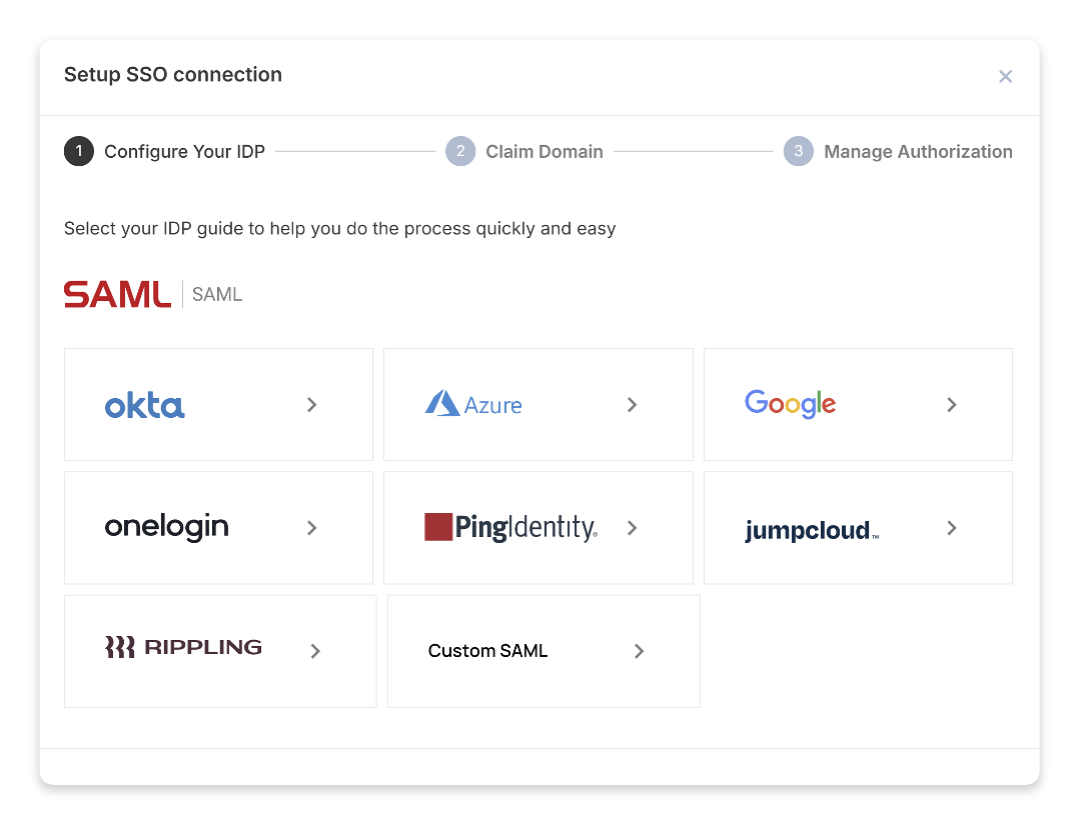
- Follow the provided instructions to complete the SSO connection setup.