Getting started
This guide provides information and step-by-step instructions on integrating Reach's Drop-In API into your application.
Step 1. Set up your environment for success
The following topics cover the setup required before making requests to the API, including acquiring necessary credentials and configuring your environment.
Credentials
Before you get started, you will need the following credentials:
- Merchant ID (MID): This credential represents your account within the Reach system.
- HMAC secret: Use this credential to validate notifications.
- API Username and password: You need these credentials to authorize requests sent to the Drop-In API. For more information, see Authentication. Requests sent to the Session API and the Order API are authorized using HTTP Basic Authorization. The API username and password supplied to you by Reach are used to create the Authorization header key/value pair. If you need support getting these credentials, contact your Reach representative or email [email protected].
For example
If your username is "account" and password is "secret," the base64-encoded value of account:secret is the string value "YWNjb3VudDpzZWNyZXQ=".
The Basic Authorization header for requests to the API would be Authorization:
Basic YWNjb3VudDpzZWNyZXQ=
Never save your MID or API credentials in any publicly accessible project or repository, especially not in client-side code. Instead, store this information in environment variables outside your project.
You must send all API requests over a secure TLS 1.2 connection.
Webhook URL
Use the webhook to send notifications from Drop-In to your backend administration system or database.
Web server
You will also need a web server for Drop-In integrations. Typically, this is the server hosting your existing store. A web server lets your app talk to the Drop-In API without exposing sensitive information like credentials or billing details.
Session request and response
A session request requires the following parameters:
| Parameter | Description |
|---|---|
MerchantReference | The supplier's unique identifier. |
Currency | Specify the three-character ISO-4217 currency code used to process the payment. |
Items | This object includes the list of items to be paid. This array must contain at least one Item. Each Item object must include Name, Amount, and Quantity properties. |
BillingProfile | Reach can store your customer's billing information, which can be retrieved later using the BillingProfileId returned in the request response.The request body requires either BillingProfile, BillingProfileReference, or BillingProfileId. If you provide the BillingProfile, the request will create a new billing profile. Otherwise, use BillingProfileReference or BillingProfileId to refer to an existing billing profile. |
AutoCapture | Drop-In supports two options for capturing funds from a transaction once the session has created and authorized the order: auto and delayed capture. This parameter flags whether a payment should be captured immediately or sometime in the future, such as when the product has shipped. For more information, see Auto capture and Delayed capture. |
CompleteUrl | This is the URL for your "success" page. The Create a new session request redirects the shopper to this page |
CancelUrl | This is the URL for your "cancel" page. If the transaction is not completed successfully, the Create a new session request redirects the shopper to this page. |
A session response contains the following parameters in a JSON object. This object contains useful information about the shopper's order, which you can store in your database and use to retrieve information about the session in the future.
| Parameters | Description |
|---|---|
SessionId | This is a unique identifier for your customer's session. The rch.js library will use it to instantiate the Drop-In app on your checkout page. |
State | The following values indicate the state of the session:CREATED: The session has been successfully created.REDIRECTED: The session has been redirected.COMPLETED: The session is complete.CANCELED: The session was cancelled.FAILED: The session has failed.
|
MerchantReference | The supplier's unique identifier. |
Currency | Displays the three-character ISO-4217 currency code used to process the payment. |
TotalAmount | The total value of the order is displayed in the customer's preferred currency. |
Items | This object contains the list of items to be paid. This array must contain at least one Item. Each Item object contains the Name, Amount, and Quantity properties. |
ViaAgent | Indicates that an agent created this session, not the end consumer. If false or not present, the session is assumed to have been placed by the end consumer. You can set this optional Boolean parameter to true in the session request. |
Step 2. Integrating Drop-In with auto or delayed capture
Capture types determine how and when Drop-In collects shoppers' payments after placing orders. Choose one of the following capture types and follow the corresponding Drop-In integration instructions:
- Auto capture: This method captures the payment automatically when the session ends, and the order is created successfully. It is ideal for businesses that have products ready to sell and want to simplify the payment process.
- Delayed capture: This method lets the supplier keep an order authorized while holding the funds. They can do this until they are ready to ship the order and collect the payment. Use this feature if your business needs more time to prepare products for shipping.
Step 2a. Integrating Drop-In with auto capture
By integrating using auto capture, you are instructing Reach to automatically capture the transaction funds as soon as the Session has created and authorized the Order.
There are the 3 Steps to the Auto Capture implementation:

Auto capture implementation flow
Step 2a.1. Create a new session with auto capture
This step shows you how to create a new session request using the Session API. This new session request occurs when a shopper adds items to their cart and goes to the checkout page on your website. For more information, see our Reach Drop-In API section.
To create a session using auto capture, send a /session request and include the required parameter:
- Go to the Session API in the Reach Drop-In API.
- Choose the programming language you want to use for code generation, such as Node.js.
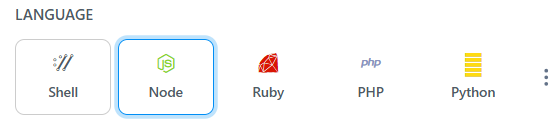
Programming language
- Provide your API username and password in the Credentials fields. The request will combine your credentials into a base64-encoded string and send it in an Authorization header to verify your request.

Credential fields
- Click API REQUEST and select the library you want to use to make the Session API request from the LIBRARY dropdown list, such as API.
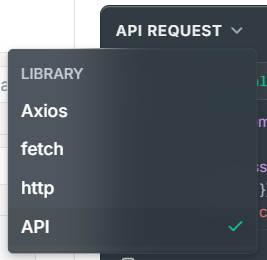
Library dropdown list
- Set the
AutoCaptureboolean totruein the request body to enable auto-capture for capturing funds from a transaction once the session has been created and the order has been authorized. Also, include the required parameters to create the session as specified in Create a new session. Some additional parameters are conditionally required depending on your customer's country of origin, which you can find on the Country-specific fields page.
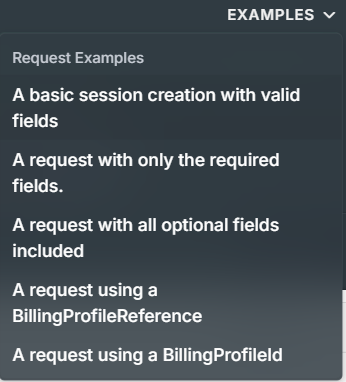
To see a fully built request, click EXAMPLES and select a request example from the Request Example dropdown list. You can copy this code into your project and adapt it to your project's requirements.
- Click Try It! to send the session request.

Try It! button
You will receive a JSON object in the response. This object contains valuable information about your customer's order, which can be stored in your database and used to retrieve information about the session in the future. To see if you enabled auto capture correctly, verify that you set the AutoCapture field to true in the response. See Session request and response for a description of the parameters and the Session API for a more detailed look at the API.
    # Location
    POST https://api.withreach.com/v1/session

    #Headers
    Authorization: Basic YWNjb3VudDpzZWNyZXQ=
    Content-Type: application/json

    #Body
    {
        "MerchantReference": "unique_reference_provided_by_supplier",
        "Currency": "USD",
        "Items": [
            {
                "Name": "Item 1",
                "Amount": 10.00,
                "Quantity": 1
            },
            {
                "Name": "Item 2",
                "Amount": 12.00,
                "Quantity": 2
            }
        ],
        "BillingProfile": {
            "Name": "First Last",
            "Email": "[email protected]",
            "Address": {
                "Street": "123 Street",
                "City": "City",
                "Region": "AB",
                "Country": "CA",
                "Postcode": "X0X0X0",
                "Phone": "4031234567"
            }
        },
        "ShippingDetails": {
            "ShippingAmount": 0.00,
            "DutyAmount": 0.00,
            "Name": "First Last",
            "Email": "[email protected]",
            "Phone": "4031231234",
            "Address": {
                "Street": "123 Street",
                "City": "City",
                "Region": "AB",
                "Country": "CA",
                "Postcode": "X0X0X0"
            }
        },
        "AutoCapture": true,
        "CompleteUrl": "https://www.send-user-here-after-success-redirect.com",
        "CancelUrl": "https://www.send-user-here-after-failed-redirect.com"
    }
#Headers
Content-Type: application/json
#Body
{
"SessionId": "91b64778-0d37-479c-ae9f-32f6685ac6ea",
"State": "CREATED",
"MerchantReference": "unique_reference_provided_by_supplier",
"Items": [
{
"Name": "Item 1",
"Amount": 10.00,
"Quantity": 1
},
{
"Name": "Item 2",
"Amount": 12.00,
"Quantity": 2
}
],
"Currency": "USD",
"TotalAmount": 34.00,
"BillingProfile": {
"Name": "First Last",
"Email": "[email protected]",
"Address": {
"Street": "123 Sreet",
"City": "City",
"Region": "AB",
"Country": "CA",
"Postcode": "X0X0X0",
"Phone": "4031234567"
}
},
"ShippingDetails": {
"ShippingAmount": 0.00,
"DutyAmount": 0.00,
"Name": "First Last",
"Email": "[email protected]",
"Phone": "4031231234",
"Address": {
"Street": "123 Sreet",
"City": "City",
"Region": "AB",
"Country": "CA",
"Postcode": "X0X0X0"
}
},
"AutoCapture": true,
"CompleteUrl": "https://www.send-user-here-after-success-redirect.com",
"CancelUrl": "https://www.send-user-here-after-failed-redirect.com"
}Step 2a.2. Instantiate Drop-In using auto capture
Follow these steps to instantiate the Drop-In using auto capture:
- Add an HTML container element to your page to hold the Drop-In.
- Create a JavaScript method to complete the logic once the Drop-In is successful.
- Create a JavaScript method to handle failure cases if the payment is not successful.
- Add the Drop-In (rch.js) script to your page. See the Drop-in rch.js guide for more detailed information about the
rch.jsfile. - Call the Reach
init()method and pass in an object with atarget,id,onSuccess, andonFailureproperties.
When finished, your page should look something like this:
<!DOCTYPE html>
<html lang="en">
    <head>
        ...
        ...
        <script defer src="https://asset.withreach.com/dist/rch.js" onload="init()"></script>
        <script>
            function onSuccess() {
                <!-- Perform any actions after the Drop-In is completed (i.e., redirect to success URL). -->
                window.location.replace("/success/");
            }
            function onFailure(error) {
                <!-- Perform any actions to handle payment failure. -->
                document.querySelector("#message").innerHTML =
                    "Oops! Something went wrong. More information: " + error.errorCode +
                    ", " + error.errorMessage + " Please review your information.";
            }
            function init() {
                <!-- 91b64778-0d37-479c-ae9f-32f6685ac6ea is the session ID -->
                RCH_CC.rchInit({target:"#rch-dropin",id:"91b64778-0d37-479c-ae9f-32f6685ac6ea", onSuccess, onFailure});
            }
        </script>
        ...
        ...
    </head>
    <body>
        ...
        ...
        <div id=”rch-dropin”></div>
        ...
        ...
    </body>
</html>
The onSuccess method passed into the init method indicates that the payment was successfully initiated, allowing you to redirect the shopper to the success page.
The onSuccess method indicates that the payment process has been successfully initiated, not that the payment is complete. The payment is finalized only when you receive the ORDER_PROCESSED notification.
The onFailure method passed into the init method is called when encountering an unrecoverable error inside the session. The error code and message are passed into onFailure and can be used to determine which action to take. For example, a message could be displayed to the end user indicating what failed.
Step 2a.3. Receive notifications for auto capture
The Drop-In will notify you when it takes action against a Session or Order. To receive these notifications, you must configure your server to listen for them by creating an endpoint at the webhook URL provided to Reach during onboarding. See the Notifications guide for more details.
If the Order is processed successfully, you will receive notifications from SESSION_COMPLETED, ORDER_AUTHORIZED, and ORDER_PROCESSED. The payment is complete once you receive the ORDER_PROCESSED notification.
For auto capture, the SESSION_COMPLETED and ORDER_AUTHORIZED notifications should be logged but not acted upon.
The ORDER_PROCESSED notification will look like this:
{
  "EventType": "ORDER_PROCESSED",
  "Order": {
    "OrderId": "cc7236aa-d11b-436c-a29c-d26cecadc847",
    "State": "PROCESSED",
    "MerchantReference": "unique_reference_provided_by_supplier",
    "SessionId": "91b64778-0d37-479c-ae9f-32f6685ac6ea"
  }
}
Upon successfully receiving a notification, you should respond with HTTP status 200. If you reply with a status outside that range, we will resend the notification later. See the Notifications guide for more details.
Step 2b. Integrating Drop-In with delayed capture
By integrating using delayed capture, the Order remains Authorized until you instruct Reach to capture the funds via an API request to the Order API.
There are 5 Steps to the delayed capture implementation:

Delayed capture implementation flow
Step 2b.1. Create a new session with delayed capture
This step shows you how to create a new session request using the Session API. This new session request occurs when a shopper adds items to their cart and goes to the checkout page on your website. For more information, see our Reach Drop-In API section.
To create a session using delayed capture, send a /session request and include the required parameters:
- Go to the Session API in the Reach Drop-In API.
- Choose the programming language you want to use for code generation, such as Node.js.
Programming language
- Provide your username and password in the Credentials fields. The request will combine your credentials into a base64-encoded string and send it in an Authorization header to verify your request.
Credential fields
- Click API REQUEST and select the library you want to use to make the Session API request from the LIBRARY dropdown list, such as API.

Library dropdown list
- Set the
AutoCaptureboolean tofalsein the request body to delay the capture of funds from a transaction after the session is created and the order is authorized. Also, include the required parameters to create the session as specified in Create a new session. Some additional parameters are conditionally required depending on your customer's country of origin, which you can find on the Country-specific fields page.
To see a fully built request, click EXAMPLES and select a request example from the Request Example dropdown list. You can copy this code into your project and adapt it to your project's requirements.
- Click Try It! to send the session request.
Try It! button
You will receive a JSON object in the response. This object contains valuable information about your customer's order, which can be stored in your database and used to retrieve information about the session in the future. To see if you delayed capture correctly, verify that you set the AutoCapture field to false in the response. See Session request and response for a description of the parameters and the Session API for a more detailed look at the API.
# Location
POST https://api.withreach.com/v1/session

#Headers
Authorization: Basic YWNjb3VudDpzZWNyZXQ=
Content-Type: application/json

#Body
{
    "MerchantReference": "unique_reference_provided_by_supplier",
    "Currency": "USD",
    "Items": [
        {
            "Name": "Item 1",
            "Amount": 10.00,
            "Quantity": 1
        },
        {
            "Name": "Item 2",
            "Amount": 12.00,
            "Quantity": 2
        }
    ],
    "BillingProfile": {
        "Name": "First Last",
        "Email": "[email protected]",
        "Address": {
            "Street": "123 Street",
            "City": "City",
            "Region": "AB",
            "Country": "CA",
            "Postcode": "X0X0X0",
            "Phone": "4031234567"
        }
    },
    "ShippingDetails": {
        "ShippingAmount": 0.00,
        "DutyAmount": 0.00,
        "Name": "First Last",
        "Email": "[email protected]",
        "Phone": "4031231234",
        "Address": {
            "Street": "123 Street",
            "City": "City",
            "Region": "AB",
            "Country": "CA",
            "Postcode": "X0X0X0"
        }
    },
    "AutoCapture": false,
    "CompleteUrl": "https://www.send-user-here-after-success-redirect.com",
    "CancelUrl": "https://www.send-user-here-after-failed-redirect.com"
}
#Headers
Content-Type: application/json
#Body
{
"SessionId": "91b64778-0d37-479c-ae9f-32f6685ac6ea",
"State": "CREATED",
"MerchantReference": "unique_reference_provided_by_supplier",
"Items": [
{
"Name": "Item 1",
"Amount": 10.00,
"Quantity": 1
},
{
"Name": "Item 2",
"Amount": 12.00,
"Quantity": 2
}
],
"Currency": "USD",
"TotalAmount": 34.00,
"BillingProfile": {
"Name": "First Last",
"Email": "[email protected]",
"Address": {
"Street": "123 Sreet",
"City": "City",
"Region": "AB",
"Country": "CA",
"Postcode": "X0X0X0",
"Phone": "4031234567"
}
},
"ShippingDetails": {
"ShippingAmount": 0.00,
"DutyAmount": 0.00,
"Name": "First Last",
"Email": "[email protected]",
"Phone": "4031231234",
"Address": {
"Street": "123 Sreet",
"City": "City",
"Region": "AB",
"Country": "CA",
"Postcode": "X0X0X0"
}
},
"AutoCapture": false,
"CompleteUrl": "https://www.send-user-here-after-success-redirect.com",
"CancelUrl": "https://www.send-user-here-after-failed-redirect.com"
}Step 2b.2. Instantiate Drop-In using delayed capture
To instantiate the most basic version of the Reach Drop-In, follow these steps:
- Add an HTML container element to your page to hold the Drop-In.
- Create a JavaScript method to complete the logic once the Drop-In is successful.
- Create a JavaScript method to handle failure cases if the payment is not successful.
- Add “Reach Drop-In” (rch.js) script to your page. See the Drop-in rch.js guide for more detailed information about the
rch.jsfile. - Call the Reach
init()method and pass in an object with atarget,id, andonSuccessproperty.
When complete, your page should look something like this:
<!DOCTYPE html>
<html lang="en">
    <head>
        ...
        ...
        <script defer src="https://asset.withreach.com/dist/rch.js" onload="init()"></script>
        <script>
            function onSuccess() {
                <!-- Perform any actions after the Drop-In is completed (i.e., redirect to success URL). -->
                window.location.replace("/success/");
            }
            function onFailure(error) {
                <!-- Perform any actions to handle payment failure. -->
                document.querySelector("#message").innerHTML =
                    "Oops! Something went wrong. More information: " + error.errorCode +
                    ", " + error.errorMessage + " Please review your information.";
            }
            function init() {
                <!-- 91b64778-0d37-479c-ae9f-32f6685ac6ea is the session ID -->
                RCH_CC.rchInit({target:"#rch-dropin",id:"91b64778-0d37-479c-ae9f-32f6685ac6ea", onSuccess, onFailure});
            }
        </script>
        ...
        ...
    </head>
    <body>
        ...
        ...
        <div id=”rch-dropin”></div>
        ...
        ...
    </body>
</html>
The onSuccess method indicates that the payment was successfully initiated, allowing you to redirect the shopper to the success page
The onSuccess method does not indicate that the payment was completed, only that the payment process has been successfully initiated. The payment is not complete until you’ve received the ORDER_PROCESSED notification.
The onFailure method passed into init()method is called when an unrecoverable error inside the session is encountered. The error code and message will be passed into onFailure and can be used to determine which action to take. For example, a message could be displayed to the end user indicating what failed.
Step 2b.3. Receive notifications using delayed capture (PaymentAuthorized order)
The Drop-In will notify you when it takes action against a Session or Order. To receive these notifications, you must configure your server to listen for them by creating an endpoint at the webhook URL provided to Reach during onboarding. See the Notifications guide for more details.
You will receive a SESSION_COMPLETED and ORDER_AUTHORIZED notification once the user has submitted their payment. Once the ORDER_AUTHORIZED notification is received, you can mark the Order as ready to be captured in your system.
The SESSION_COMPLETED is an informational notification indicating that the user has completed their interaction with the Drop-In. It should be logged but not actioned.
The ORDER_AUTHORIZED notification will look like this:
{
  "EventType": "ORDER_AUTHORIZED",
  "Order": {
    "OrderId": "cc7236aa-d11b-436c-a29c-d26cecadc847",
    "State": "PAYMENT_AUTHORIZED",
    "MerchantReference": "unique_reference_provided_by_supplier",
    "SessionId": "91b64778-0d37-479c-ae9f-32f6685ac6ea"
  }
}
Upon successfully receiving a notification, you should respond with HTTP status 200. If you reply with a status outside that range, we will resend the notification later. See the Notifications guide for more details.
Step 2b.4. Capture the order
When you can capture the order, send an HTTP POST to the Order API. You will need the OrderId from within the ORDER_AUTHORIZED notification or by looking up the Session via an API call to get the embedded OrderId (Session.Order.OrderId).
See the Order API guide for a more in-depth view of the Capture Order request.
   #Location
   POST https://api.withreach.com/v1/order/{OrderId}/capture

   #Headers
   Authorization: Basic YWNjb3VudDpzZWNyZXQ=

   #Body
   <empty>
#Headers
Content-Type: application/json
#Body
{
"OrderId": "cc7236aa-d11b-436c-a29c-d26cecadc847",
"State": "PROCESSED",
"MerchantReference": "1234567890",
"SessionId": "91b64778-0d37-479c-ae9f-32f6685ac6ea",
"Reason": {
"Code": "Captured",
"Retryable": false
}
}There are three different successful responses you can receive from the Capture Order request:
- Captured: The Order was successfully captured.
- PendingNotification: The Order capture attempt was successful. However, due to our third-party processor, the capture is pending completion, and you will be notified once it is completed.
- UnderReview: The Order capture attempt was successful. Completion of the capture is pending an internal review by Reach’s team, and you will be notified once it is completed.
See the Order API guide for a more in-depth view of the Capture Order response.
Step 2b.5. Receive notifications (process the order)
Not all capture Order requests will be synchronous. If this was the case for your capture Order request, you must wait for the ORDER_PROCESSED notification to mark your Order as complete/captured.
The ORDER_PROCESSED notification will look like this:
{
  "EventType": "ORDER_PROCESSED",
  "Order": {
    "OrderId": "cc7236aa-d11b-436c-a29c-d26cecadc847",
    "State": "PROCESSED",
    "MerchantReference": "unique_reference_provided_by_supplier",
    "SessionId": "91b64778-0d37-479c-ae9f-32f6685ac6ea"
  }
}
Upon successfully receiving a notification, you should respond with HTTP status 200. We will resend the notification if you reply with a status outside that range. See the Notifications guide for more details.
Step 3. Get FX rates
To get a list of rates, send an HTTP GET request to the getRates API. Depending on the configuration of your Reach account, the getRates API will respond with either Guaranteed or Spot Rates. See FX rates for more information.
Localization and getRates
The Reach FX solution supports local processing of payments in 100+ currencies, allowing you to display local currency dynamically based on your customer’s location.

getRates flow chart
Understanding getRates
- The supplier sends a
getRatesrequest to thegetRatesAPI. - The
getRatesAPI will respond with the list of currencies and their FX rates enabled in your Reach account. - The supplier displays a currency selector utilizing the
getRatesresponse details. - The shopper selects their preferred currency on the supplier's website.
- The supplier calculates and displays the prices in the shopper's local currency.
GET https://api.sandbox.withreach.com/v2.2/getRates?merchantId=yourMerchantIdSpot rates
If you configured your account for spot rates, the response to getRates will include only a Currency code and an indicated Rate.
{
  "Rates": [
    {
       "Currency": "ZMW",
       "Rate": 13.059026
    },
    {    "Currency": "ZAR",
         "Rate": 15.326697
    },
  ]
}The rate indication serves only as an approximation of the converted prices based on current market rates. Due to market fluctuations, the foreign exchange rate used to settle the transaction may differ slightly from the indicated rate provided by getRates when the transaction is complete.
Guaranteed rates
If you configured your account for guaranteed rates, the response to getRates will include the Currency Code, the Rate ID, the Expiry Date, and the Rate used when creating a session.
{
  "RateOffers": [
     {
        "Currency": "EUR",
        "Id": "e3ac01e4-f48b-4f38-ba31-cd2bf51d61ba",
        "Expiry": "2016-10-03T18:04:21.830514Z",
        "Rate": 0.9349
     },
     {
        "Currency": "CAD",
        "Id": "8ca2b5a3-8120-4238-88ff-8811223aaef8",
        "Expiry": "2016-10-03T18:04:21.524409Z",
        "Rate": 1.3842
     }
  ]
}Rate offers usually expire 24 hours after they are created, although longer expiry times may be available in special circumstances. For a better user experience, we recommend calling getRates twice daily. This approach allows for multiple non-expired rate offers. In such cases, the latest rate offer should be used for new visitors.
How to use your guaranteed rate (optional)
To guarantee your exchange rate, pass along the RateOfferId from the response when creating a session.
POST /v1/session HTTP/1.1
Host: api.sandbox.withreach.com
Authorization: Basic YWNjb3VudDpzZWNyZXQ=
Content-Type: application/json
{
  "MerchantReference": "unique_reference_provided_by_supplier",
  "RateOfferId": "e3ac01e4-f48b-4f38-ba31-cd2bf51d61ba",
  "Items": [
    {
      "Name": "Item 1",
      "Amount": 10.0,
      "Quantity": 1
    },
    {
      "Name": "Item 2",
      "Amount": 12.0,
      "Quantity": 2
    }
  ],
  "BillingProfile": {
    "Name": "First Last",
    "Email": "[email protected]",
    "Address": {
      "Street": "123 Street",
      "City": "City",
      "Region": "AB",
      "Country": "CA",
      "Postcode": "X0X0X0",
      "Phone": "4031234567"
    }
  },
  "ShippingDetails": {
    "ShippingAmount": 0.0,
    "DutyAmount": 0.0,
    "Name": "First Last",
    "Email": "[email protected]",
    "Phone": "4031231234",
    "Address": {
      "Street": "123 Street",
      "City": "City",
      "Region": "AB",
      "Country": "CA",
      "Postcode": "X0X0X0"
    }
  },
  "AutoCapture": true,
  "CompleteUrl": "https://www.send-user-here-after-success-redirect.com",
  "CancelUrl": "https://www.send-user-here-after-failed-redirect.com"
}
Step 4. Create a currency selector
Use the getRates Currency response to create a currency selector for your shoppers. See FX rates for more information.

Currency selector
Step 5. Calculate prices
Use the getRates response to calculate and display your product prices in the shopper's local or preferred currency. For more information, see FX rates.

Calculate and display prices
Updated 4 months ago