WooCommerce guide
Step 1. Install the plugins
Follow the steps below to install the Avalara AvaTax and Kount Fraud Prevention plugins.
- Sign in to WooCommerce.
- In the left navigation pane, expand Plugins and click Add Plugin.

Expand Plugins and click Add Plugin
- Enter
Avalara AvaTaxin the search field. - Click Avalara AvaTax in the search results.
- Click Install and activate.
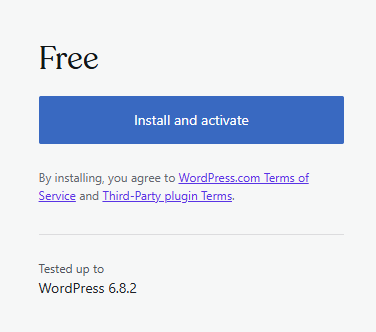
Install and activate
- Repeat steps 2 through 5 for Kount Fraud Prevention.
Step 2. Configure Avalara AvaTax
- In the left navigation pane, expand Plugins and click Installed Plugins.
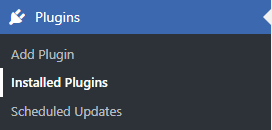
Expand Plugins and click Installed Plugins
-
Enter
Avalara AvaTaxin the Search installed plugins field.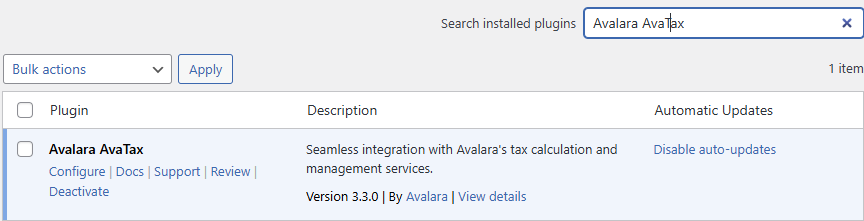
Avalara AvaTax plugin
-
Under Avalara AvaTax in the search results list, click Configure.
WooCommerce AvaTax calculation is disabled. Please configure your full Origin Address.If you see this message, you need to set up your store's physical location, which is needed to for AvaTax to calculate taxes correctly.
To configure your Origin Address:
- Click the General tab on the settings page.
- Under Store Address, enter your complete business address.
- Save your changes and return to the Tax tab to enable AvaTax.
- Enter the Avalara account ID provided by your Reach representative in the Account ID field.
- Enter the Avalara license key provided by your Reach representative in the License Key field.
- Click Connect to production to connect to your production environment or Connect to sandbox to connect to your sandbox environment.
- Click Sync settings. Once synced, Avalara can calculate taxes in real-time and file returns.
Step 3. Configure tax settings
- Sign in to the WooCommerce dashboard.
- Click WooCommerce in the left navigation pane.
- Click Collect sales tax under Configure your tax settings.
-
Step 4. Configure Kount settings
- Click Kount in the left navigation pane.
- Enter the Kount merchant ID provided by your Reach representative in the Merchant ID field.
- Enter the Kount command API key provided by your Reach representative in the Kount Command API key field.
- Enter the website ID provided by your Reach representative in the Website ID field.
- Select Pre-Authorization from the Payment Workflow Mode dropdown list.
- In the ENS Callback URL field, enter the URL configured in the Agent Web Console (AWC) to receive Event Notification System messages.
- In the Order Cancellation Message field, enter the text you want to appear when an order is cancelled, such as "
Order has been cancelled." - Click the Regenerate Consumer key & Secret key button.
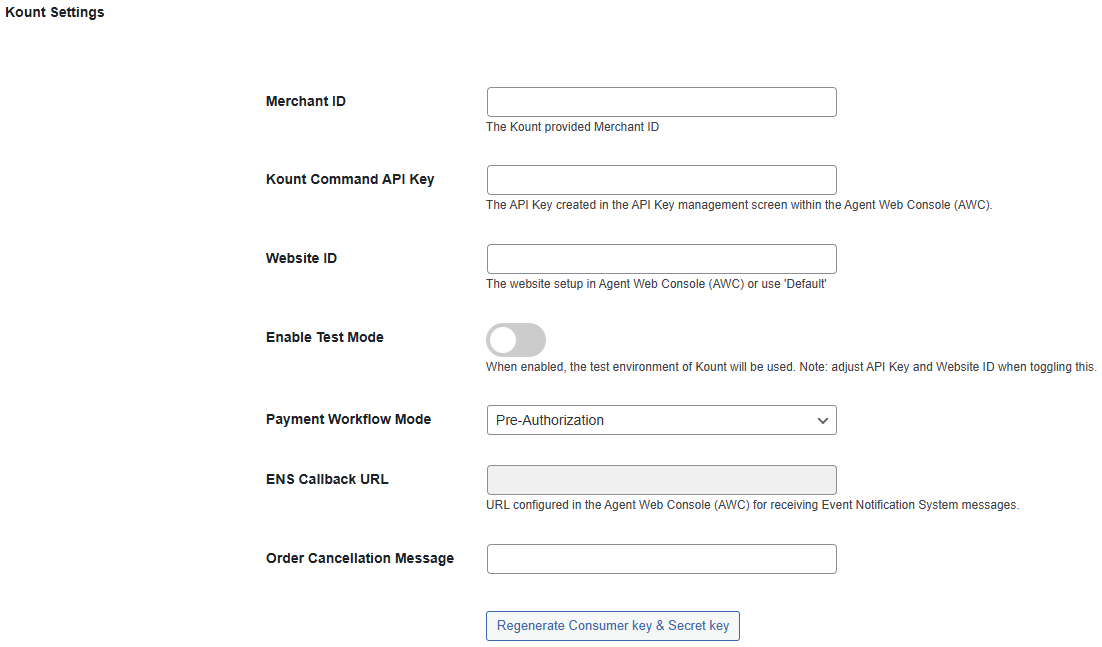
- Under Event Logging, select Debug from the Select log level dropdown list.
- Enter
30in the Log delete duration (in days) field. - To download an event log file, select a log file from the Download log file dropdown list and click Download log file.
- Click Save Changes.
Updated 3 months ago