Shopify Plus multi-entity solution guide
This guide walks you through setting up your Shopify Plus store with our Reach entities and embedded solution, which includes powerful features, such as:
- Our true localization leads to higher conversions and lower fees.
- Complete global tax compliance with automatic collection and remittance.
- Flexible global scaling without the stress.
Reach plugs into your existing Shopify Plus storefront and unlocks the next level of your global business.
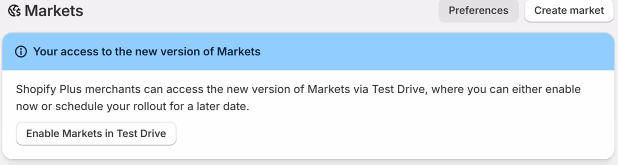
Step 1. Enable support for markets in the Test Drive
You must enroll in Test Drive markets for the Shopify Plus multi-entity solution.
-
Sign in to Shopify Plus.
-
Click Markets, then click Enable Markets in Test Drive.
-
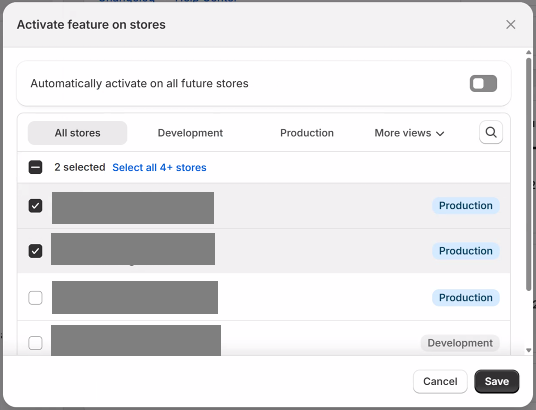
In the Organization section, select Feature test drives.
-
Locate the new Markets test drive section.
-
Click Activate feature on Stores.
-
Select the stores you want to activate the new Markets experience on.
-
Click Save.
Step 2. Activating Reach in Shopify Plus
Complete the steps below to configure a Reach business (selling) entity for each market you're selling into.
Important
Do not begin these steps until the scheduled go-live call with Reach. Your Reach representative will securely provide you with business details, account representative information, government identification, and any business and ownership documents that Shopify requires.
Step 2a. Add or change a business entity
Under Add business entity, complete the required information. Reach will provide business details, account representative information, government identification, business documents, and ownership documents. Your Reach account representative will securely supply this information as needed.
-
Sign in to Shopify, and click Settings in the lower left corner.
-
Click Organization. in the navigation pane.
-
Enter the organization's name provided by your Reach representative in the Organization name field.

-
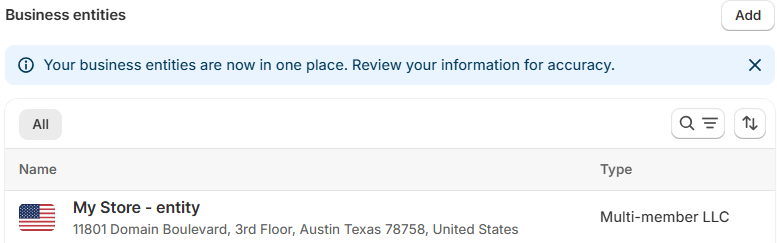
Under Business entities, choose one of the following options:
-
To add a new business entity, follow these steps:
-
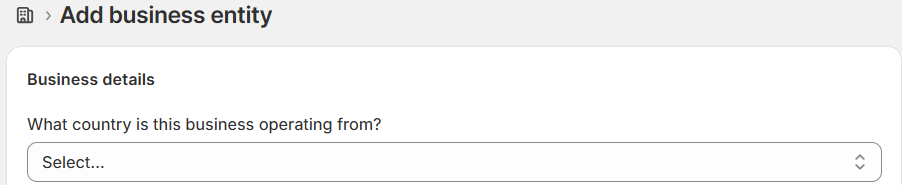
Click Add.

-
Select the country where your business operates (where your customers are) from the Select dropdown list.
-
Under How this business is registered?, select Registered.

-
Select the option from the What type of business are you operating? dropdown provided by your Reach representative. The options in this list vary depending on the country you selected in step c.

-
-
To change a business entity:
-
Click the entity under Business entities.
-
Click the edit icon.

-
-
-
Enter the registered business name provided by your Reach representative in the Registered business name field.

-
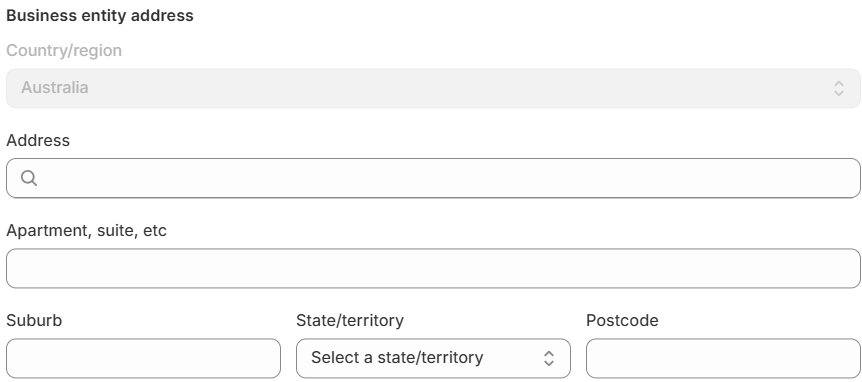
Under Business entity address, enter the street address provided by your Reach representative in the Address field and verify that the remaining address fields are correct.
-
Click Save.

Step 2b. Add people
To add the account representative for this business entity, follow these steps:
-
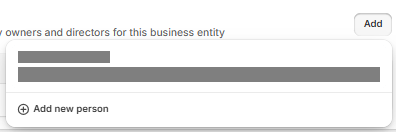
Under People, click Add to add an account representative.

-
Choose one of the following options:
-
If an account representative exists, select the account representative from the Add dropdown list.
-
If no account representative exists, click Add new person from the Add dropdown list and complete the fields using the information provided by your Reach Representative. Note that you only need to provide this information when you create your first business (selling) entity. For each additional business entity, select the account representative you made for the first business entity.
-
-
When finished, click Save.

Step 2c. Add government identifications
To add the required government identifications, follow these steps:
-
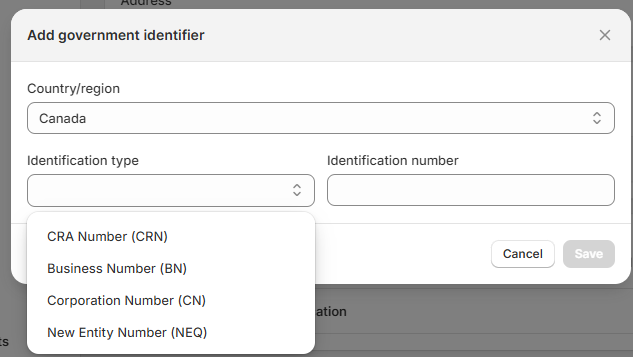
Under Government identifications, click Add government identifications.
-
Select an identification type from the Identification type dropdown list. Your Reach representative will indicate which types to select. Note that the identification type varies based on the country/region associated with the business (selling) entity.
-
Enter the number in the Identification number field.
-
Click Save.
-
Repeat steps 1 through 4 for each additional identification type.
Step 2d. Add documents
To add the business and ownership verification documents for the business (selling) entity, follow these steps:
-
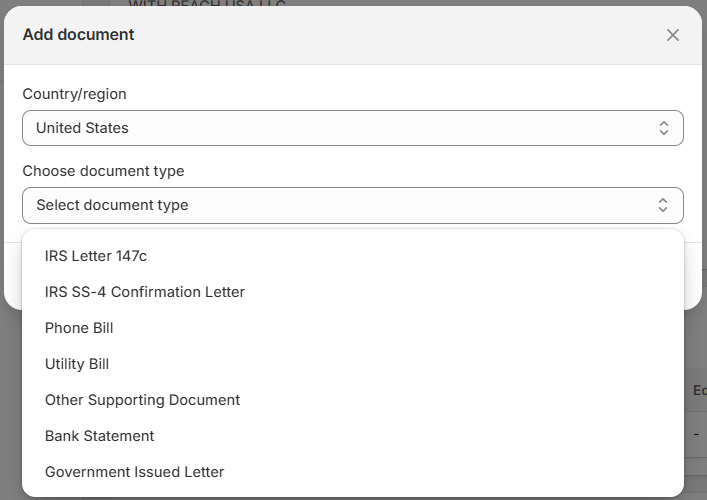
Under Documents, click Add document.
-
Choose a documentation type from the Documentation type dropdown list. Your Reach representative will indicate which types to select. Note that the documentation type varies based on the country/region associated with the business (selling) entity.
-
Click Add file, select the file, and then click Done. Your Reach representative will provide the required documents.
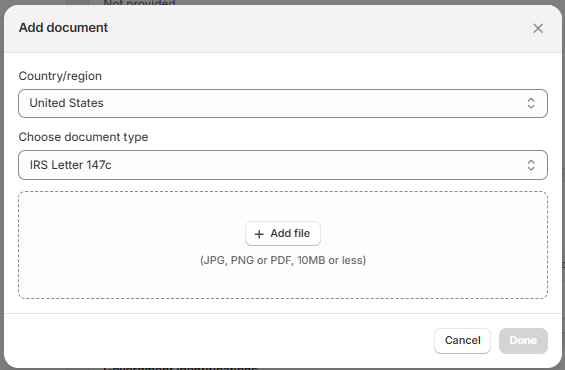
-
Repeat steps 1 through 3 for each additional identification type.
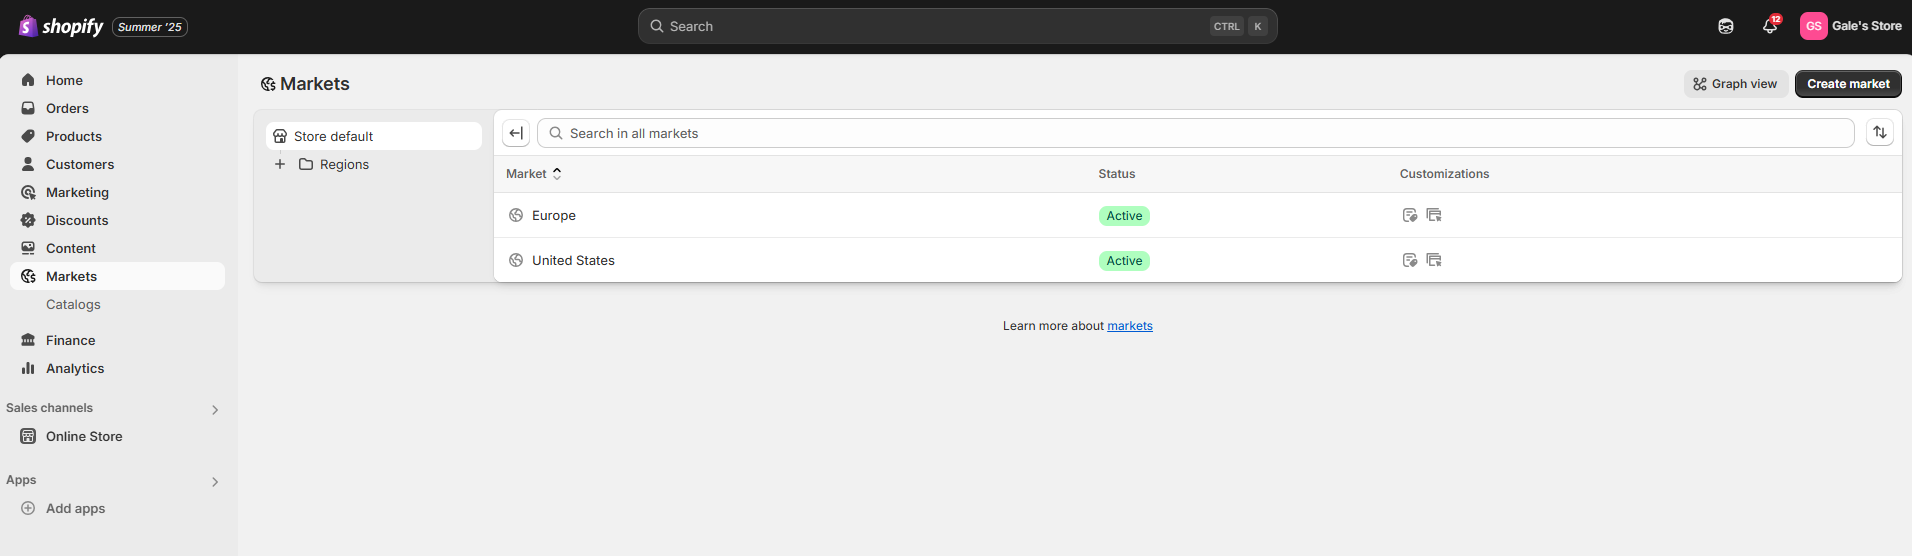
Step 3. Routing markets to entities
To create a market for each region you're selling into and map that traffic to the correct business entity (selling entity), follow these steps:
-
Return to your Shopify store's Home page and click Markets.
-
Click Create market.
-
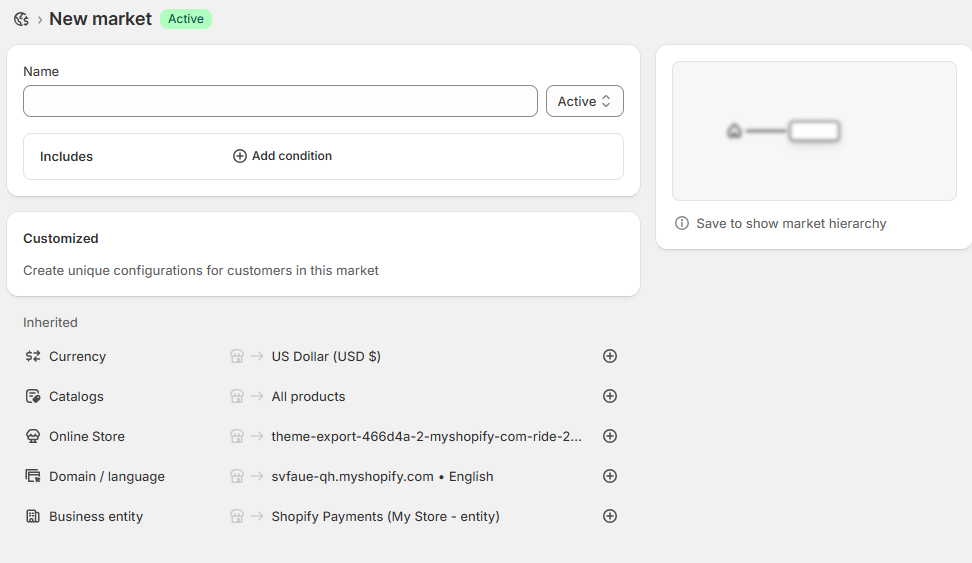
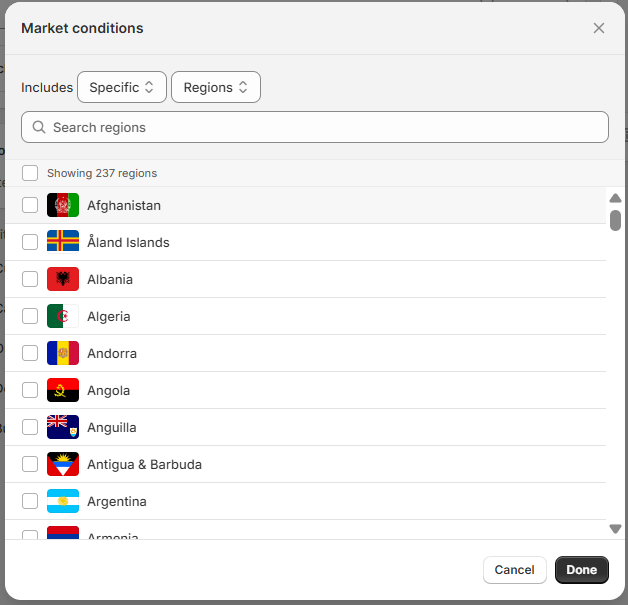
From the New market page, enter the market's name in the Name field and click Add condition.
-
Select the checkbox next to each country where the market will sell, and click Done.
-
To route the market to a business entity created earlier, click Business entity and select the appropriate business entity from the list. For example, if you have a separate entity for each region, select the one corresponding to this market.
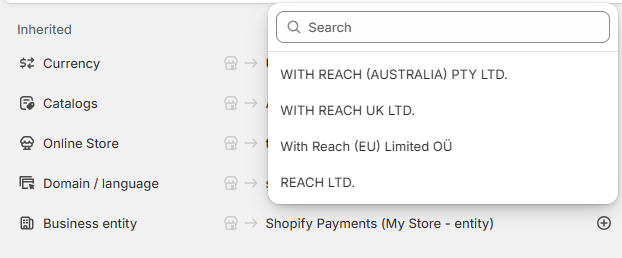
The business entity associated with this market appears under Customized.

-
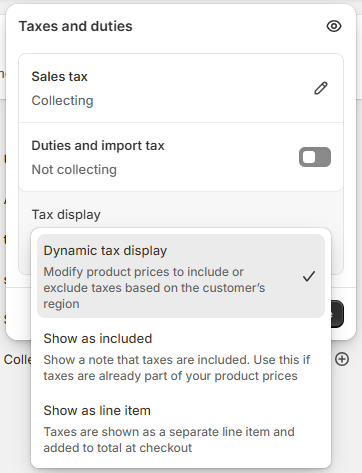
Click Taxes and duties and select the appropriate option. Your options are:
-
Dynamic tax display: Select this option if you want Shopify to include or exclude taxes based on the customer's region. This means that customers will see the final price with or without taxes, depending on where they are.
-
Show as included: Select this option for tax-inclusive countries. This means that the price shown to the customer already includes the applicable taxes.
-
Show as line item: Select this option for tax-exclusive countries.
-
-
Click Save. After saving, you're ready to accept payments through this selling entity.
-
Repeat 2-7 for each additional selling entity.
Step 4. Add the bank account
Important
Reach is legally responsible for all aspects of payment processing, from receiving payments to processing refunds and chargebacks. For that reason, you must add Reach's bank account information. Your Reach representative will provide this information during the go-live call.
Adding the bank account
- Click Payments, and then click Shopify payments.
- Click Add Shopify Payments account.
- Select a business entity from the Connect to a business entity list and click Continue.
- Enter the bank account information provided by your Reach representative and click Save. The required bank account information for each country/region is provided below.
- Repeat steps 2 through 5 for each additional business (selling) entity.
Australia
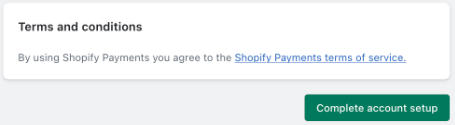
For Australia, provide the following information and click Save. By clicking Save, you agree to accept the terms and conditions.
| Required information | Description |
|---|---|
| Payout currency | By default, this field should display Australian Dollar (AUD $). |
| Bank State Branch Number | Enter a 6-digit numerical code used to identify Reach's branch of a financial institution in Australia. Reach will provide this information. |
| Account number | Enter a 5 to 9-digit identifier for Reach's bank account. Reach will provide this information. |
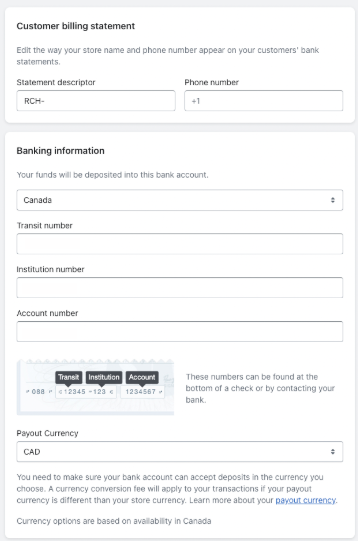
Canada
For Canada, provide the following information and click Complete account setup to accept the terms and conditions.
| Required information | Description |
|---|---|
| Statement descriptor | Provide the name you want to appear on your customers' credit card statements when they purchase a product from your store. This descriptor should match the one you provided in the onboarding request. This name will help customers identify the charge and reduce chargebacks due to unrecognized transactions. The format for the statement descriptor is RCH-[your descriptor], where your descriptor must be from 2 to 19 characters in length. |
| Phone number | Provide your company's business phone number. Customers can call this number if they have questions about a charge on their credit card statement. |
| Your funds will be deposited in this bank account | Select Canada from the dropdown list. |
| Transit number | Enter the 5-digit transit number that identifies the branch for Reach's financial institution. Reach will provide this information. |
| Institution number | Enter the 3-digit institution number identifying Reach's financial institution. Reach will provide this information. |
| Account number | Enter the 7-digit account number identifying Reach's bank account. Reach will provide this information. |
| Payout currency | Select CAD from the dropdown list. |
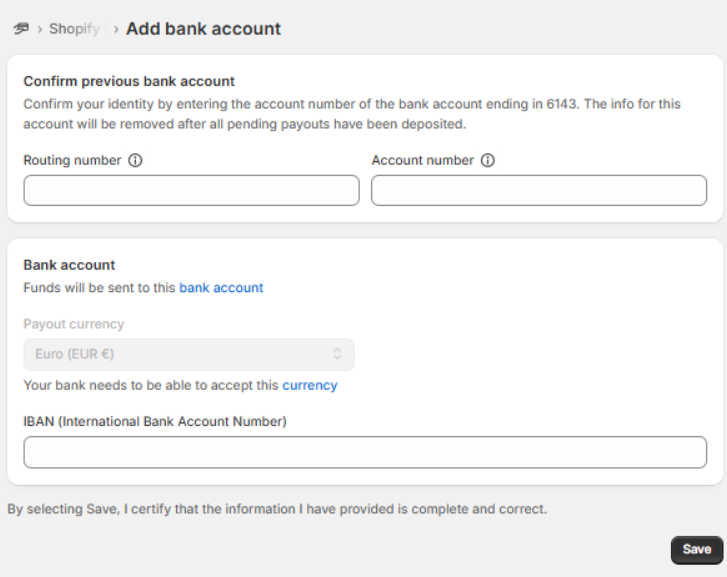
The European Union
For the European Union, provide the following information and click Save. By clicking Save, you agree to accept the terms and conditions.
| Required information | Description |
|---|---|
| Routing number | Enter the 9-digit routing number provided by your Reach representative. |
| Account number | Enter a 5 to 9-digit identifier for Reach's bank account. Reach will provide this information. |
| Payout currency | By default, this field should display Euro (EUR €). |
| IBAN (International Bank Account Number) | Enter the IBAN number provided by your Reach representative. |
The United Kingdom
For the United Kingdom, provide the following information and click Save. By clicking Save, you agree to accept the terms and conditions.
| Required information | Description |
|---|---|
| Sort code | Enter the 6-digit number that identifies Reach's bank and branch provided by your Reach representative. |
| Account number | Enter the 5 to 9-digit number that identifies Reach's account provided by your Reach representative. |
| IOSS VAT certificate | Enter the IOSS VAT number provided by your Reach representative when required. |

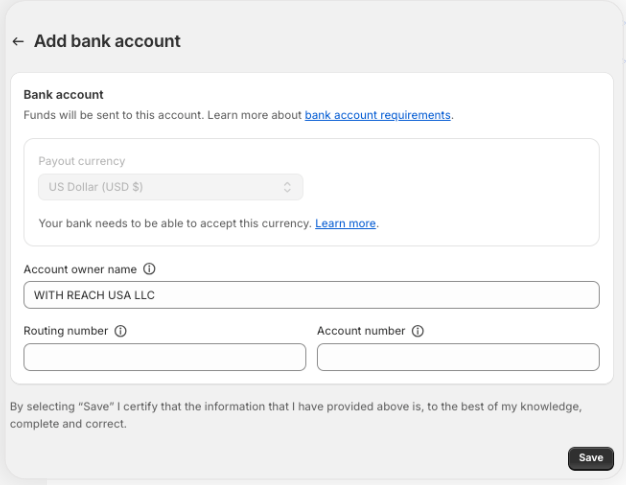
The United States
For the United States, provide the following information and click Save. By clicking Save, you agree to accept the terms and conditions.
| Required information | Description |
|---|---|
| Account owner name | Enter the name of the selling entity provided by your Reach representative. |
| Routing number | Enter the 9-digit routing number provided by your Reach representative. |
| Account number | Enter the 8 to 12-digit account number provided by your Reach representative. |
Contact Support message
When you add a bank account and click Save, the following message will appear:

Don't worry when presented with this message. Shopify will hold payouts while it verifies the new account, but shoppers can still seamlessly check out and complete their purchases. This verification process ensures your account's security without disrupting your shopping experience.
Step 5. Update the name on the billing statement
-
Click Payments in the left navigation.
-
Under Customer billing statement, add
RCHbetween SP and your shop name, legal entity name, or DBA name. The name of the statement appears on the customer's billing statement.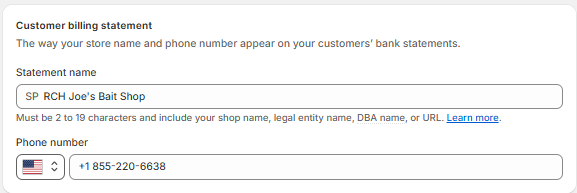
-
Click Save.
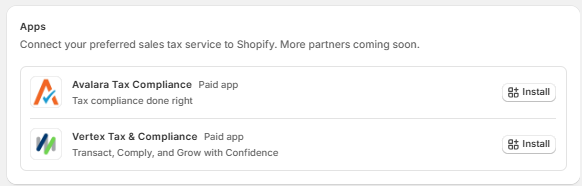
Step 6. Turn on the Avalara Tax Compliance app
Follow the instructions below to install and activate the Avalara Tax Compliance app on your Shopify store. This app ensures global tax compliance and the automatic collection and remittance of taxes.
Avalara connects to your store and syncs it to a Reach-managed Avalara account provided by your Reach representative. Reach will ensure your Shopify store shows customers accurate VAT, GST, and sales tax calculations. Reach also withholds, files, and remits the taxes we collect to the correct authorities. With Reach and Avalara, the tax doesn't have to be that hard.
Step 6a. Install the Avalara Tax Compliance app
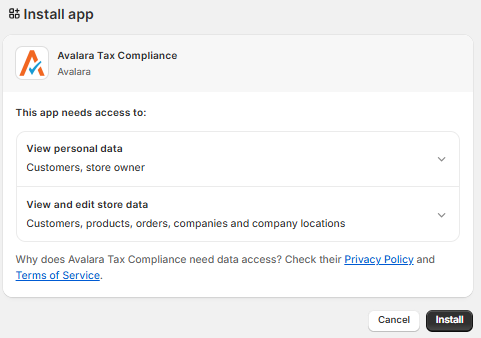
- From your Shopify admin, go to Settings and click Taxes and duties.
- Scroll down to Apps.
- Next to Avalara Tax Compliance, click Install.
Note
Avalara Tax Compliance is a paid application, and Reach has purchased it on your behalf.
- From the Avalara Tax Compliance page, click Install Avalara Tax Compliance.

- To install the Avalara Tax Compliance app, click Install.
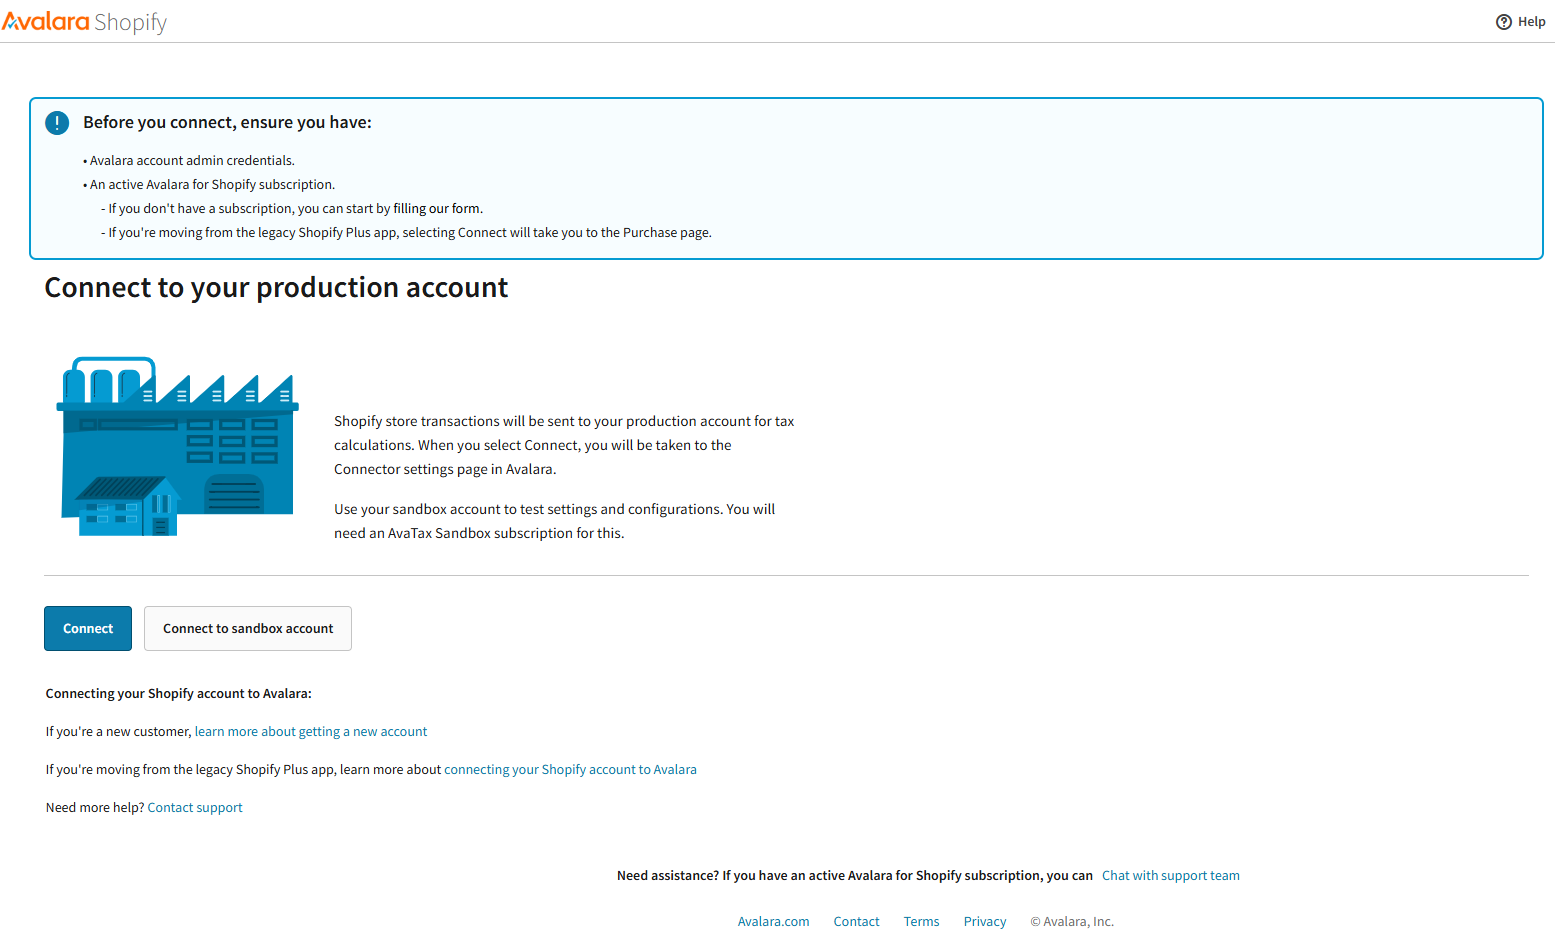
You'll see the Connect to your production account page for Avalara Shopify. At this point, your Reach representative will configure and activate the Avalara Tax Compliance app on your behalf.
Step 6b. Activate the Avalara Tax Compliance app
Your Reach representative will enter the Avalara credentials and activate and configure the Avalara Tax Compliance app. Avalara will import your Shopify stock keeping units (SKUs).
Important
Do not begin this step until the scheduled go-live call with Reach. Your Reach representative will activate the Avalara Tax Compliance app during that call.
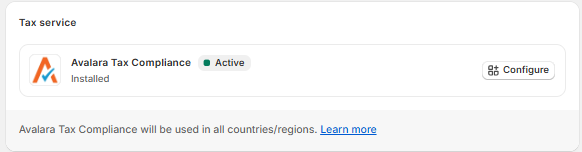
Once activated, verify the following items:
- Avalara Tax Compliance displays Active
- Regional settings display Backup only
- Understand Shopify-specific warnings
- Ensure the tax display for each market is correct
- Verify that "Include sales tax in product price and shipping rate" is turned off
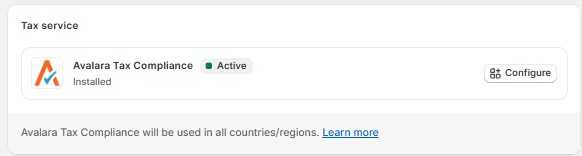
Avalara Tax Compliance displays Active
After activating the Avalara Tax Compliance app, go to Taxes and duties and verify that Avalara Tax Compliance displays Active, indicating that Avalara now provides taxes and duties.
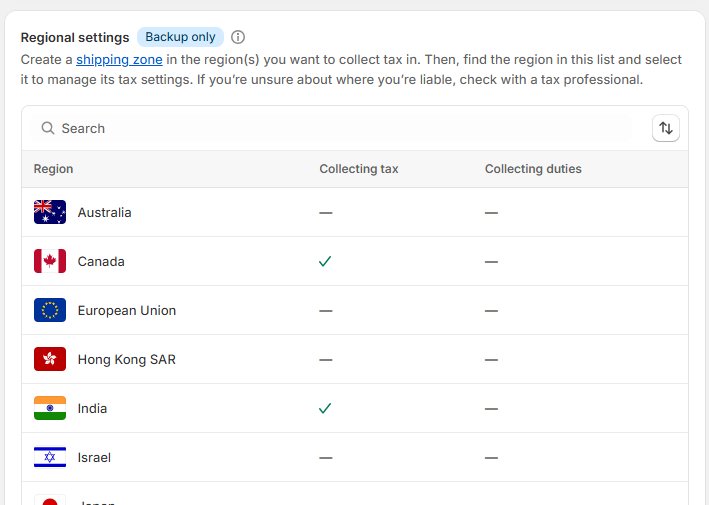
Regional settings display Backup only
The Regional settings on the Taxes and duties page display Backup only because Avalara overrides Shopify's regional settings.

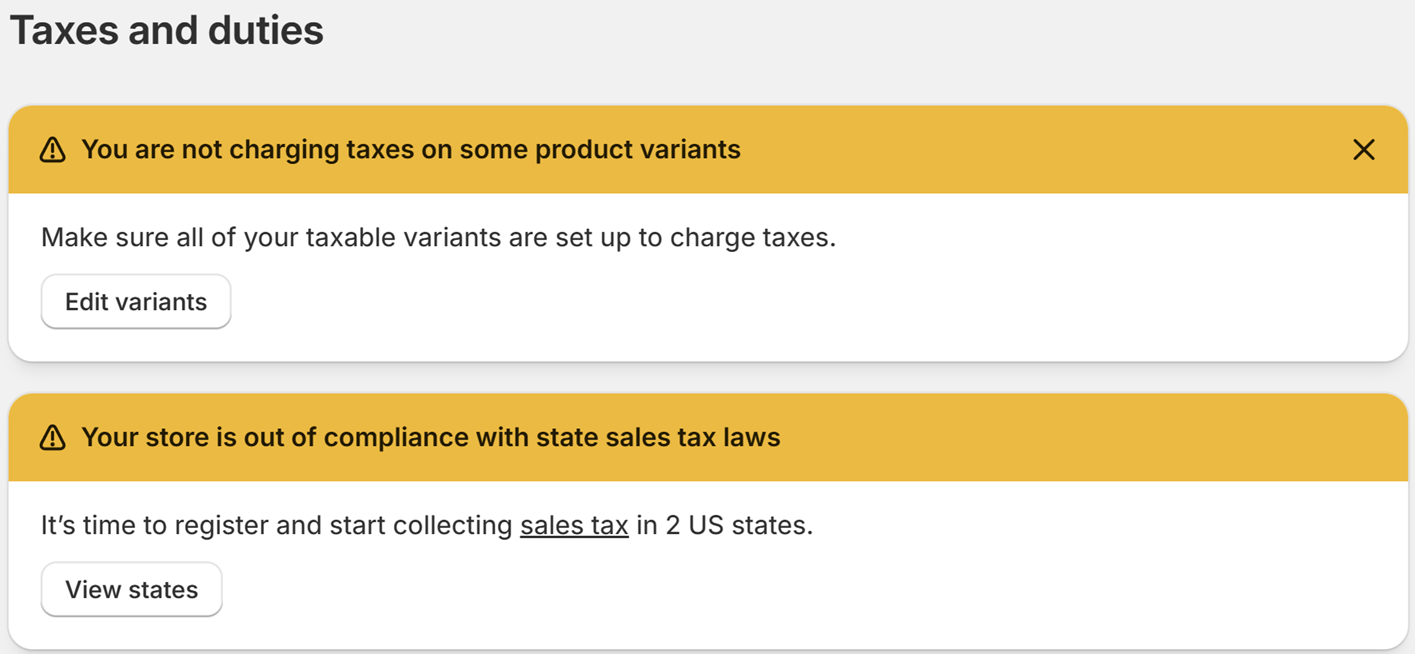
Understand Shopify-specific warnings
You may also see the following warnings. Shopify displays warnings when Shopify tax calculations are not working. In this instance, Avalara Tax Compliance is activated and provides tax calculations instead of Shopify.
Everything is OK
Shopify may still display specific warnings after configuring the Avalara Tax Compliance app. Don’t worry; everything functions correctly, and Avalara calculates taxes accurately. Additionally, note that your selected countries no longer appear in the list of countries under Regional settings, and you can disregard this list. Avalara takes care of taxes and duties for every country.
Ensure the tax display for each market is correct
Ensure that all your markets display the tax correctly. The tax display for each market should look like what you set up in Step 3. Routing markets to entities.
Verify that "Include sales tax in product price and shipping rate" is turned off
On the Taxes and duties page, clear the following checkbox:

Important
Avalara Tax Compliance is currently active. Selecting this checkbox will negatively impact the tax calculations.
Step 7. Set up alternative payment methods (optional)
See Set up alternative payment methods for Shopify Payments or Shopify Plus (optional) for instructions.
Updated 10 days ago